Hello World
Hello World
In this post, I will set up the basic dependencies of Literature Vault and create a simple "Hello World" example to demonstrate that the dependencies are working correctly.
We decided to:
- Use Python as the programming language for this project
- Use Typer for building the CLI
- Use FastMCP for building the MCP interface
- Use SQLite for storage, with the
sqlite-vecextension for vector search
I'm going to use uv as the Python package manager. It is a modern alternative to tools like pip and poetry, and it has some nice features like fast dependency resolution and built-in support for virtual environments.
If you want to follow along, make sure you have Python and uv installed on your machine. I'm on macOS, so I installed both of them using Homebrew:
brew install python uv
You can check that you have them installed by running:
python --version
uv --version
On my machine, this shows:
Python 3.13.12
uv 0.11.21
I created a new directory for the project and initialized a git repository. I suggest you do the same and add a reasonable .gitignore file for Python projects:
# Python
__pycache__/
*.py[cod]
*$py.class
*.so
.Python
build/
dist/
*.egg-info/
*.egg
.eggs/
develop-eggs/
downloads/
eggs/
lib/
lib64/
parts/
sdist/
var/
wheels/
share/python-wheels/
MANIFEST

# Virtual environments
.venv/
venv/
env/
ENV/
.env
.env.*

# uv
.uv/

# Testing / coverage
.pytest_cache/
.coverage
.coverage.*
htmlcov/
.tox/
.nox/
coverage.xml
*.cover
.hypothesis/

# Type checkers / linters
.mypy_cache/
.dmypy.json
dmypy.json
.ruff_cache/
.pyre/
.pytype/

# Jupyter
.ipynb_checkpoints/

# IDEs / editors
.idea/
.vscode/
*.swp
*.swo
*~

# OS
.DS_Store
Thumbs.db
Next, I initialized a new Python project using uv:
uv init --package --name literature-vault
This creates this directory structure:
.
├── pyproject.toml
├── README.md
└── src
    └── literature_vault
        └── __init__.py
The pyproject.toml file is where uv tracks the project metadata and dependencies. Let's install the dependencies we need for this project:
uv add typer fastmcp
We need a few development dependencies too, for testing and linting:
uv add --dev pytest ruff
pytest is a popular testing framework for Python, and ruff is a fast Python linter and code formatter.
We can do a quick test from the terminal to make sure this all works:
uv run python -c "import typer, fastmcp; print('stack ok')"
On my machine, this prints: stack ok, which means the dependencies are installed correctly and we can import them without any issues.
In my case, uv set a very new Python requirement in pyproject.toml, so I changed it:
- requires-python = ">=3.14"
+ requires-python = ">=3.12"
The >=3.14 requirement is surprisingly aggressive. Python 3.14 is not a stable baseline for a normal project yet. Python 3.12 is a much more reasonable minimum version, and it still has all the features we need for this project.
Now run uv sync to update the lock file with this change.
Next, run the project using uv run:
uv run literature-vault
The literature-vault command is created automatically by uv based on the package name. In pyproject.toml, uv wires that command to a Python function:
[project.scripts]
literature-vault = "literature_vault:main"
That means the command imports the literature_vault package and calls its main function. For now, that function lives in src/literature_vault/__init__.py, which uv also created automatically:
def main() -> None:
    print("Hello from literature-vault!")
So when you run uv run literature-vault, it executes the main function and prints "Hello from literature-vault!" to the terminal.
Hello CLI
Let's wire up the Typer CLI now. The idea is to keep the application logic separate from the CLI code, so that we can reuse the logic in different contexts (e.g., in the MCP server) without duplicating it.
Create a new file, src/literature_vault/core.py, and put this in it:
def hello(name: str = "world") -> str:
    return f"Hello, {name}!"
Now create another file, src/literature_vault/cli.py, with the following content:
import typer
from literature_vault.core import hello

app = typer.Typer()


@app.callback()
def main() -> None:
    """Literature Vault command line interface."""


@app.command()
def greet(name: str = typer.Argument("world")) -> None:
    typer.echo(hello(name))
This is the Typer layer. It imports the plain function and decides how to expose it in the terminal. Let's break down the file:
- We import
typerand thehellofunction fromcore.py. - We create a
Typerapp instance. - We define a callback using the
@app.callback()decorator. This gives the CLI a top-level entry point and makes Typer treat the app as a group of commands. - We define a command using the
@app.command()decorator. The functiongreetis the command handler, and it takes anameargument that defaults to "world". - The
typer.Argument("world")part tells Typer the command will take an argument calledname, and if the user doesn't provide it, it will default to "world". This also allows Typer to generate help text for the command. - Inside the command, we call the
hellofunction and print its result usingtyper.echo().
The callback may look unnecessary right now, but it gives us the CLI shape we want for this project. Literature Vault will eventually have commands like lv add, lv search, and lv list, so it is better to start with an explicit command group instead of a single top-level command.
Now open pyproject.toml and change this:
  [project.scripts]
- literature-vault = "literature_vault:main"
+ lv = "literature_vault.cli:app"
I made two changes here:
- I changed the command name from
literature-vaulttolv, which is the name I wanted for the CLI. - I changed the target from
literature_vault:maintoliterature_vault.cli:app, which tells uv to import theappobject fromliterature_vault/cli.pyand run it when someone runslv.
Now run:
uv run lv greet Ali
You should see:
Hello, Ali!
Also try:
uv run lv --help
You should see the top-level help text generated by Typer, including the greet command.
 Usage: lv [OPTIONS] COMMAND [ARGS]...

 Literature Vault command line interface.

╭─ Commands ────────────────────────────────────────────────────────╮
│ greet                                                             │
╰───────────────────────────────────────────────────────────────────╯
You can also ask for help for the greet command:
uv run lv greet --help
That help text shows the name argument and its default value.
 Usage: lv greet [OPTIONS] [NAME]

╭─ Arguments ───────────────────────────────────────────────────────╮
│   name      [NAME]  [default: world]                              │
╰───────────────────────────────────────────────────────────────────╯
╭─ Options ─────────────────────────────────────────────────────────╮
│ --help          Show this message and exit.                       │
╰───────────────────────────────────────────────────────────────────╯
That is the first real payoff from Typer: because the function has a typed parameter, Typer can generate command-line help from it.
Hello MCP
Now let's expose the same hello function through MCP. This is the reason we put the application logic in core.py instead of writing it directly inside the Typer command. The CLI and the MCP server should both be thin wrappers around the same underlying Python function.
Create a new file, src/literature_vault/mcp_server.py, with the following content:
from fastmcp import FastMCP

from literature_vault.core import hello

mcp = FastMCP("Literature Vault")


@mcp.tool
def greet(name: str = "world") -> str:
    return hello(name)


if __name__ == "__main__":
    mcp.run()
This should feel very similar to the Typer file:
- We import the same
hellofunction fromcore.py. - We create a FastMCP server named
Literature Vault. - We decorate a normal Python function with
@mcp.toolto expose it as an MCP tool. - Inside the tool, we call the same core function that the CLI uses.
At this point, the structure is exactly what we wanted:
src/literature_vault
├── __init__.py
├── cli.py
├── core.py
└── mcp_server.py
The important part is that core.py does not know anything about Typer or FastMCP. It is just Python code. The interface-specific files import that code and expose it in different ways.
Now let's test the MCP server with the official MCP Inspector. The Inspector is a local browser UI for testing and debugging MCP servers. It lets us see the tools exposed by the server and call them manually, without wiring the server into Claude Desktop, Cursor, or another MCP host yet.
The Inspector runs through npx, so you need Node.js installed.
Then launch the Inspector from the project directory:
npx -y @modelcontextprotocol/inspector uv run python -m literature_vault.mcp_server
This opens the Inspector UI in your browser.
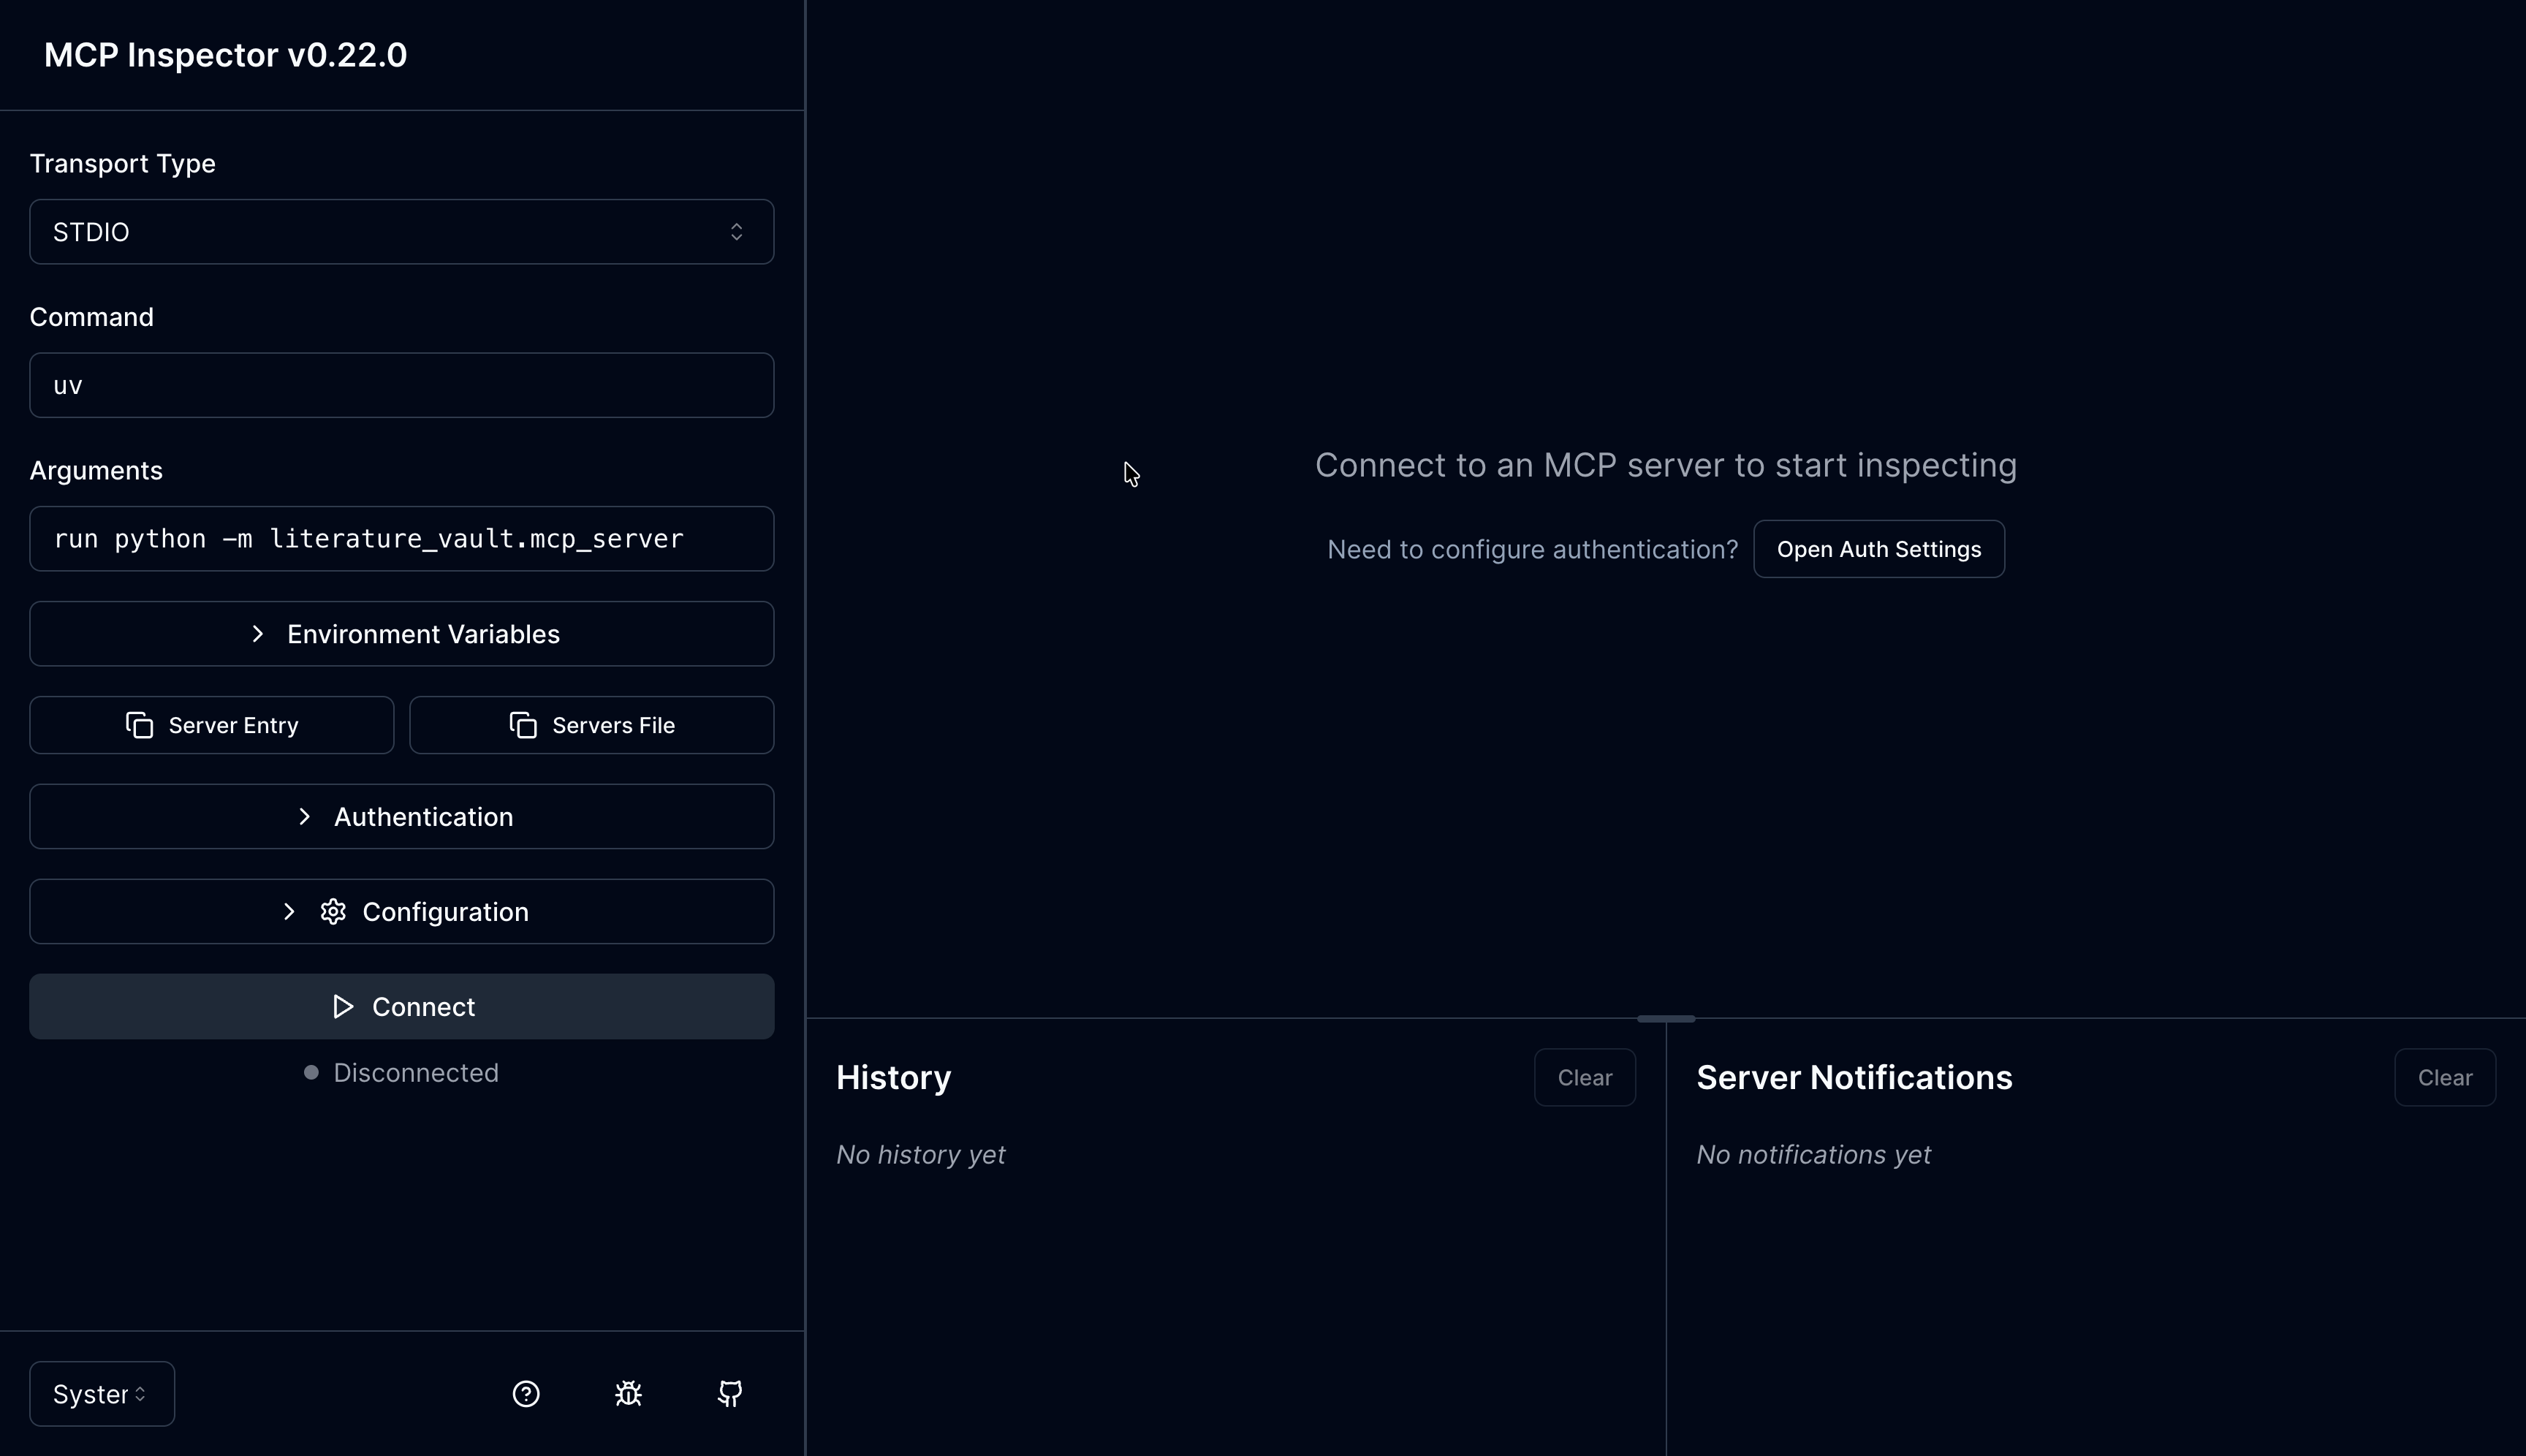
The left sidebar should already be filled in with:
Transport Type: STDIO
Command: uv
Arguments: run python -m literature_vault.mcp_server
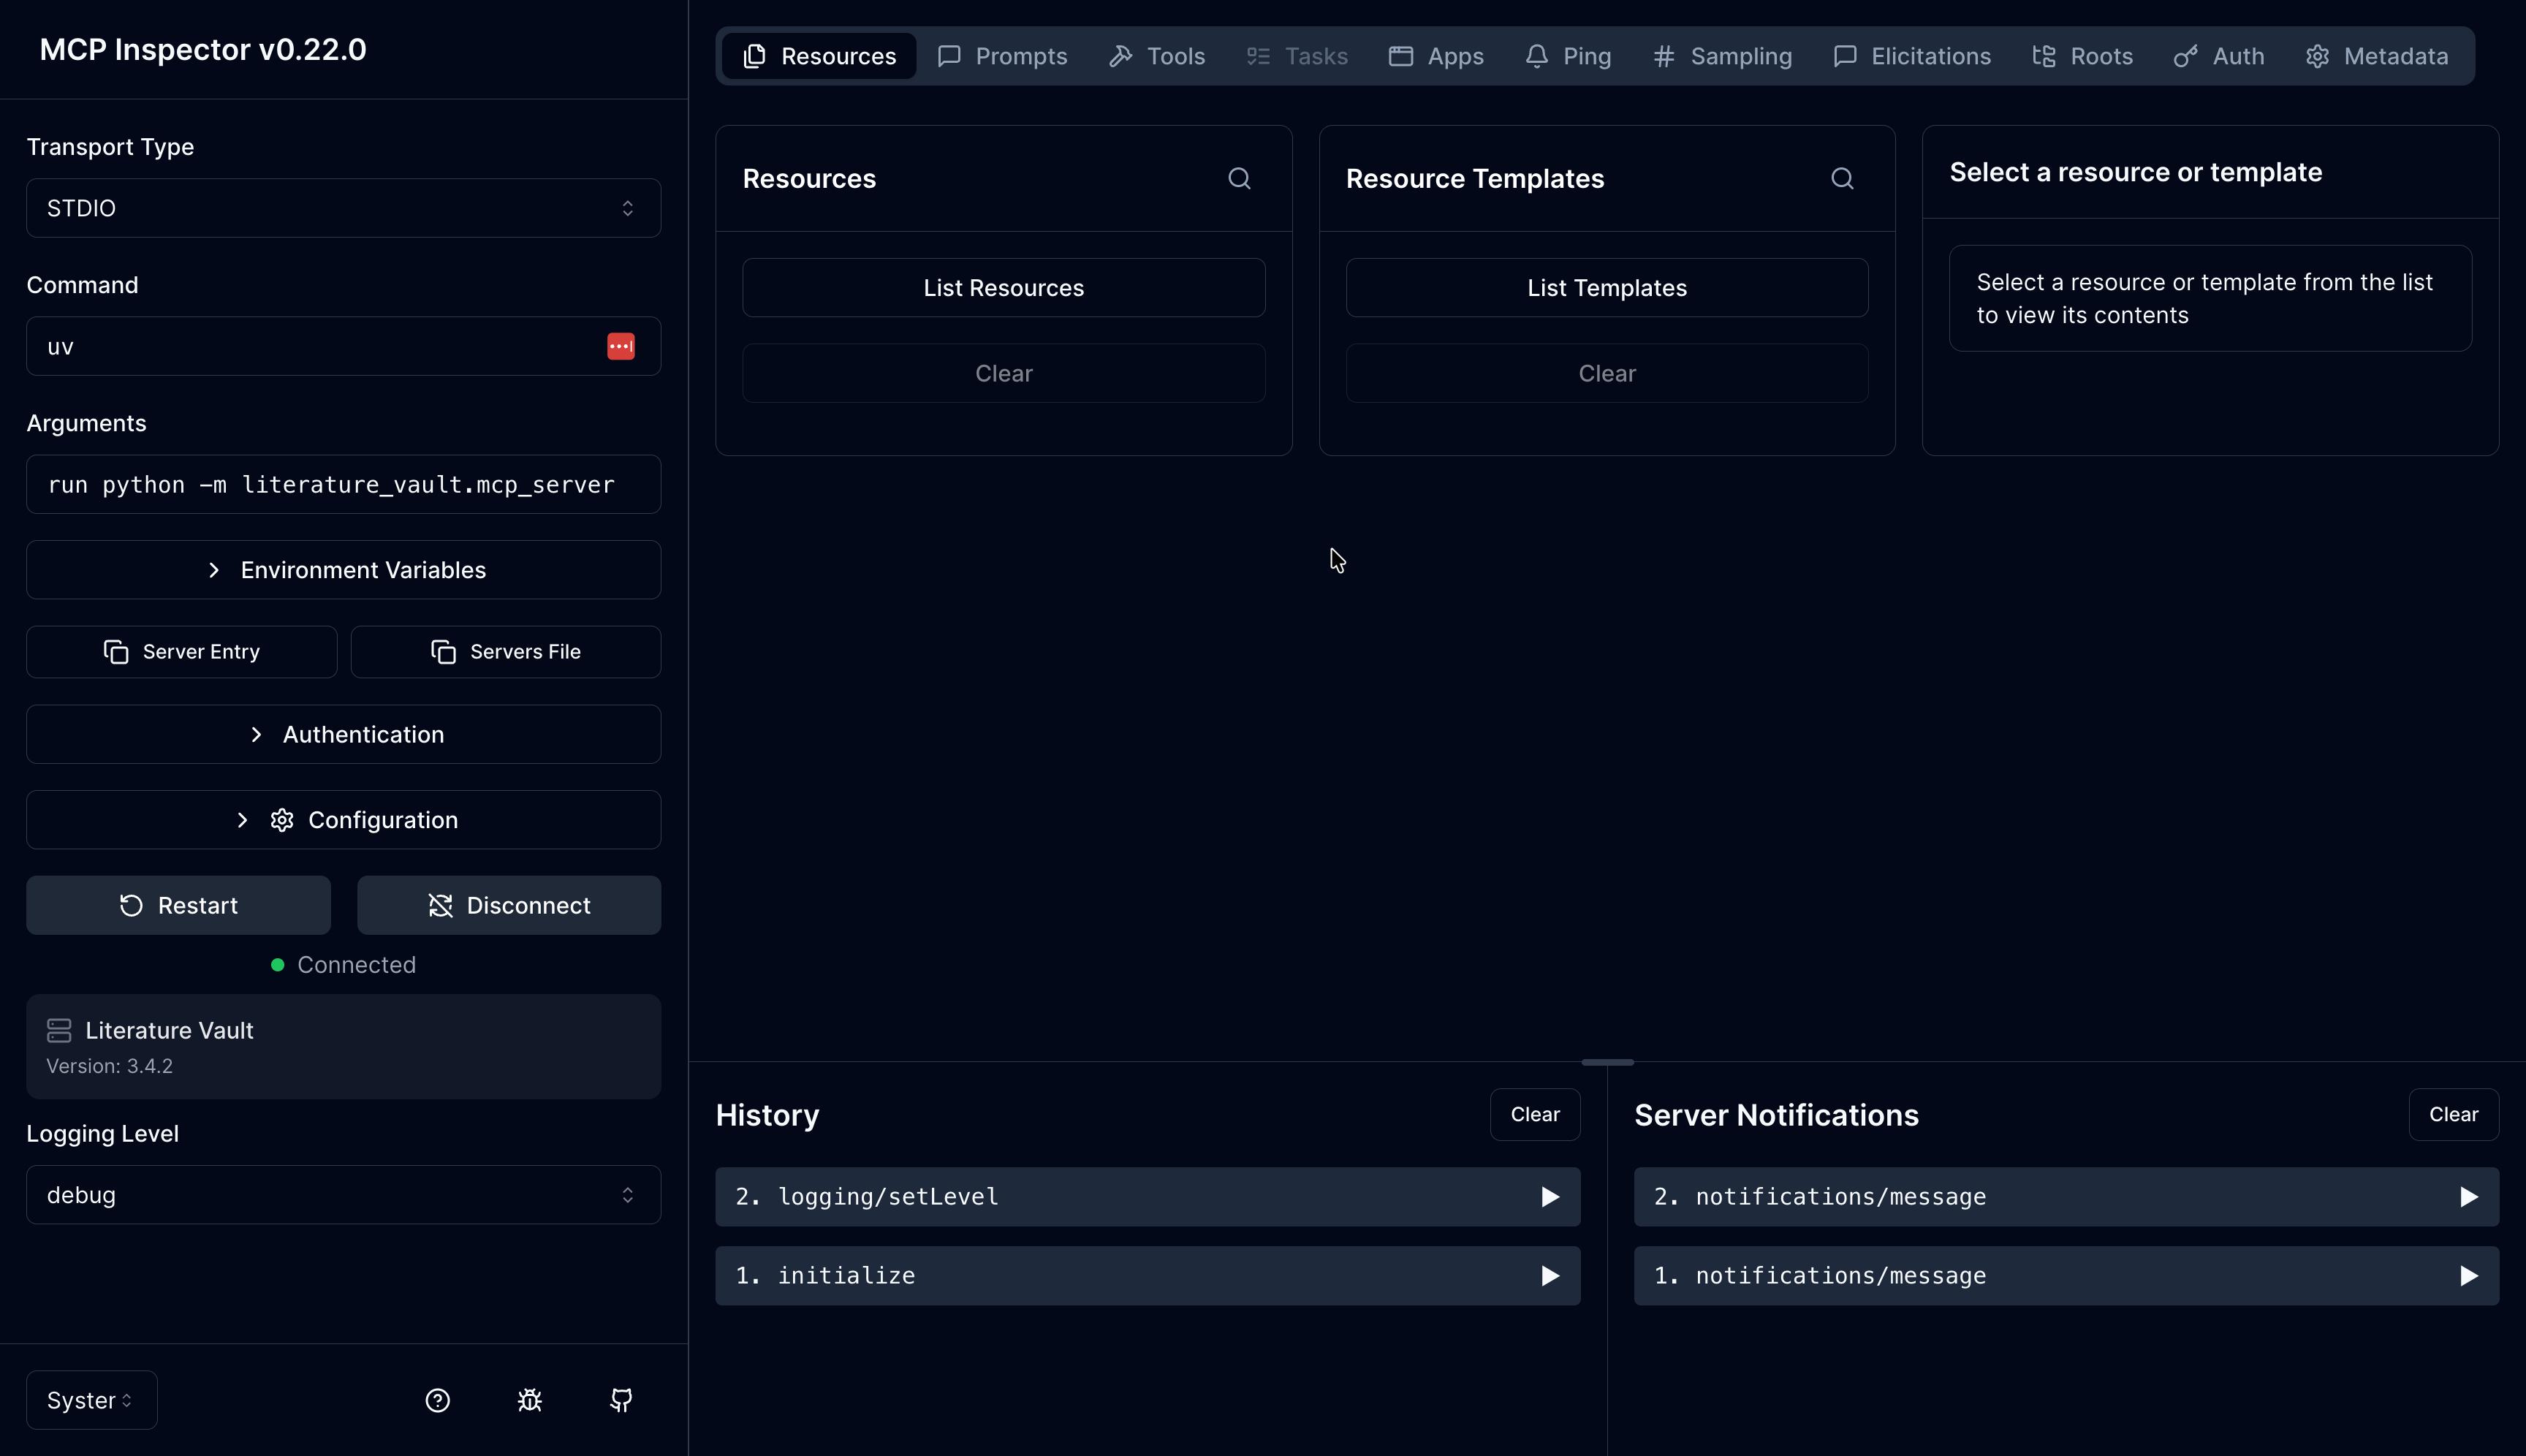
Click Connect. This starts the MCP server process and connects the Inspector to it.
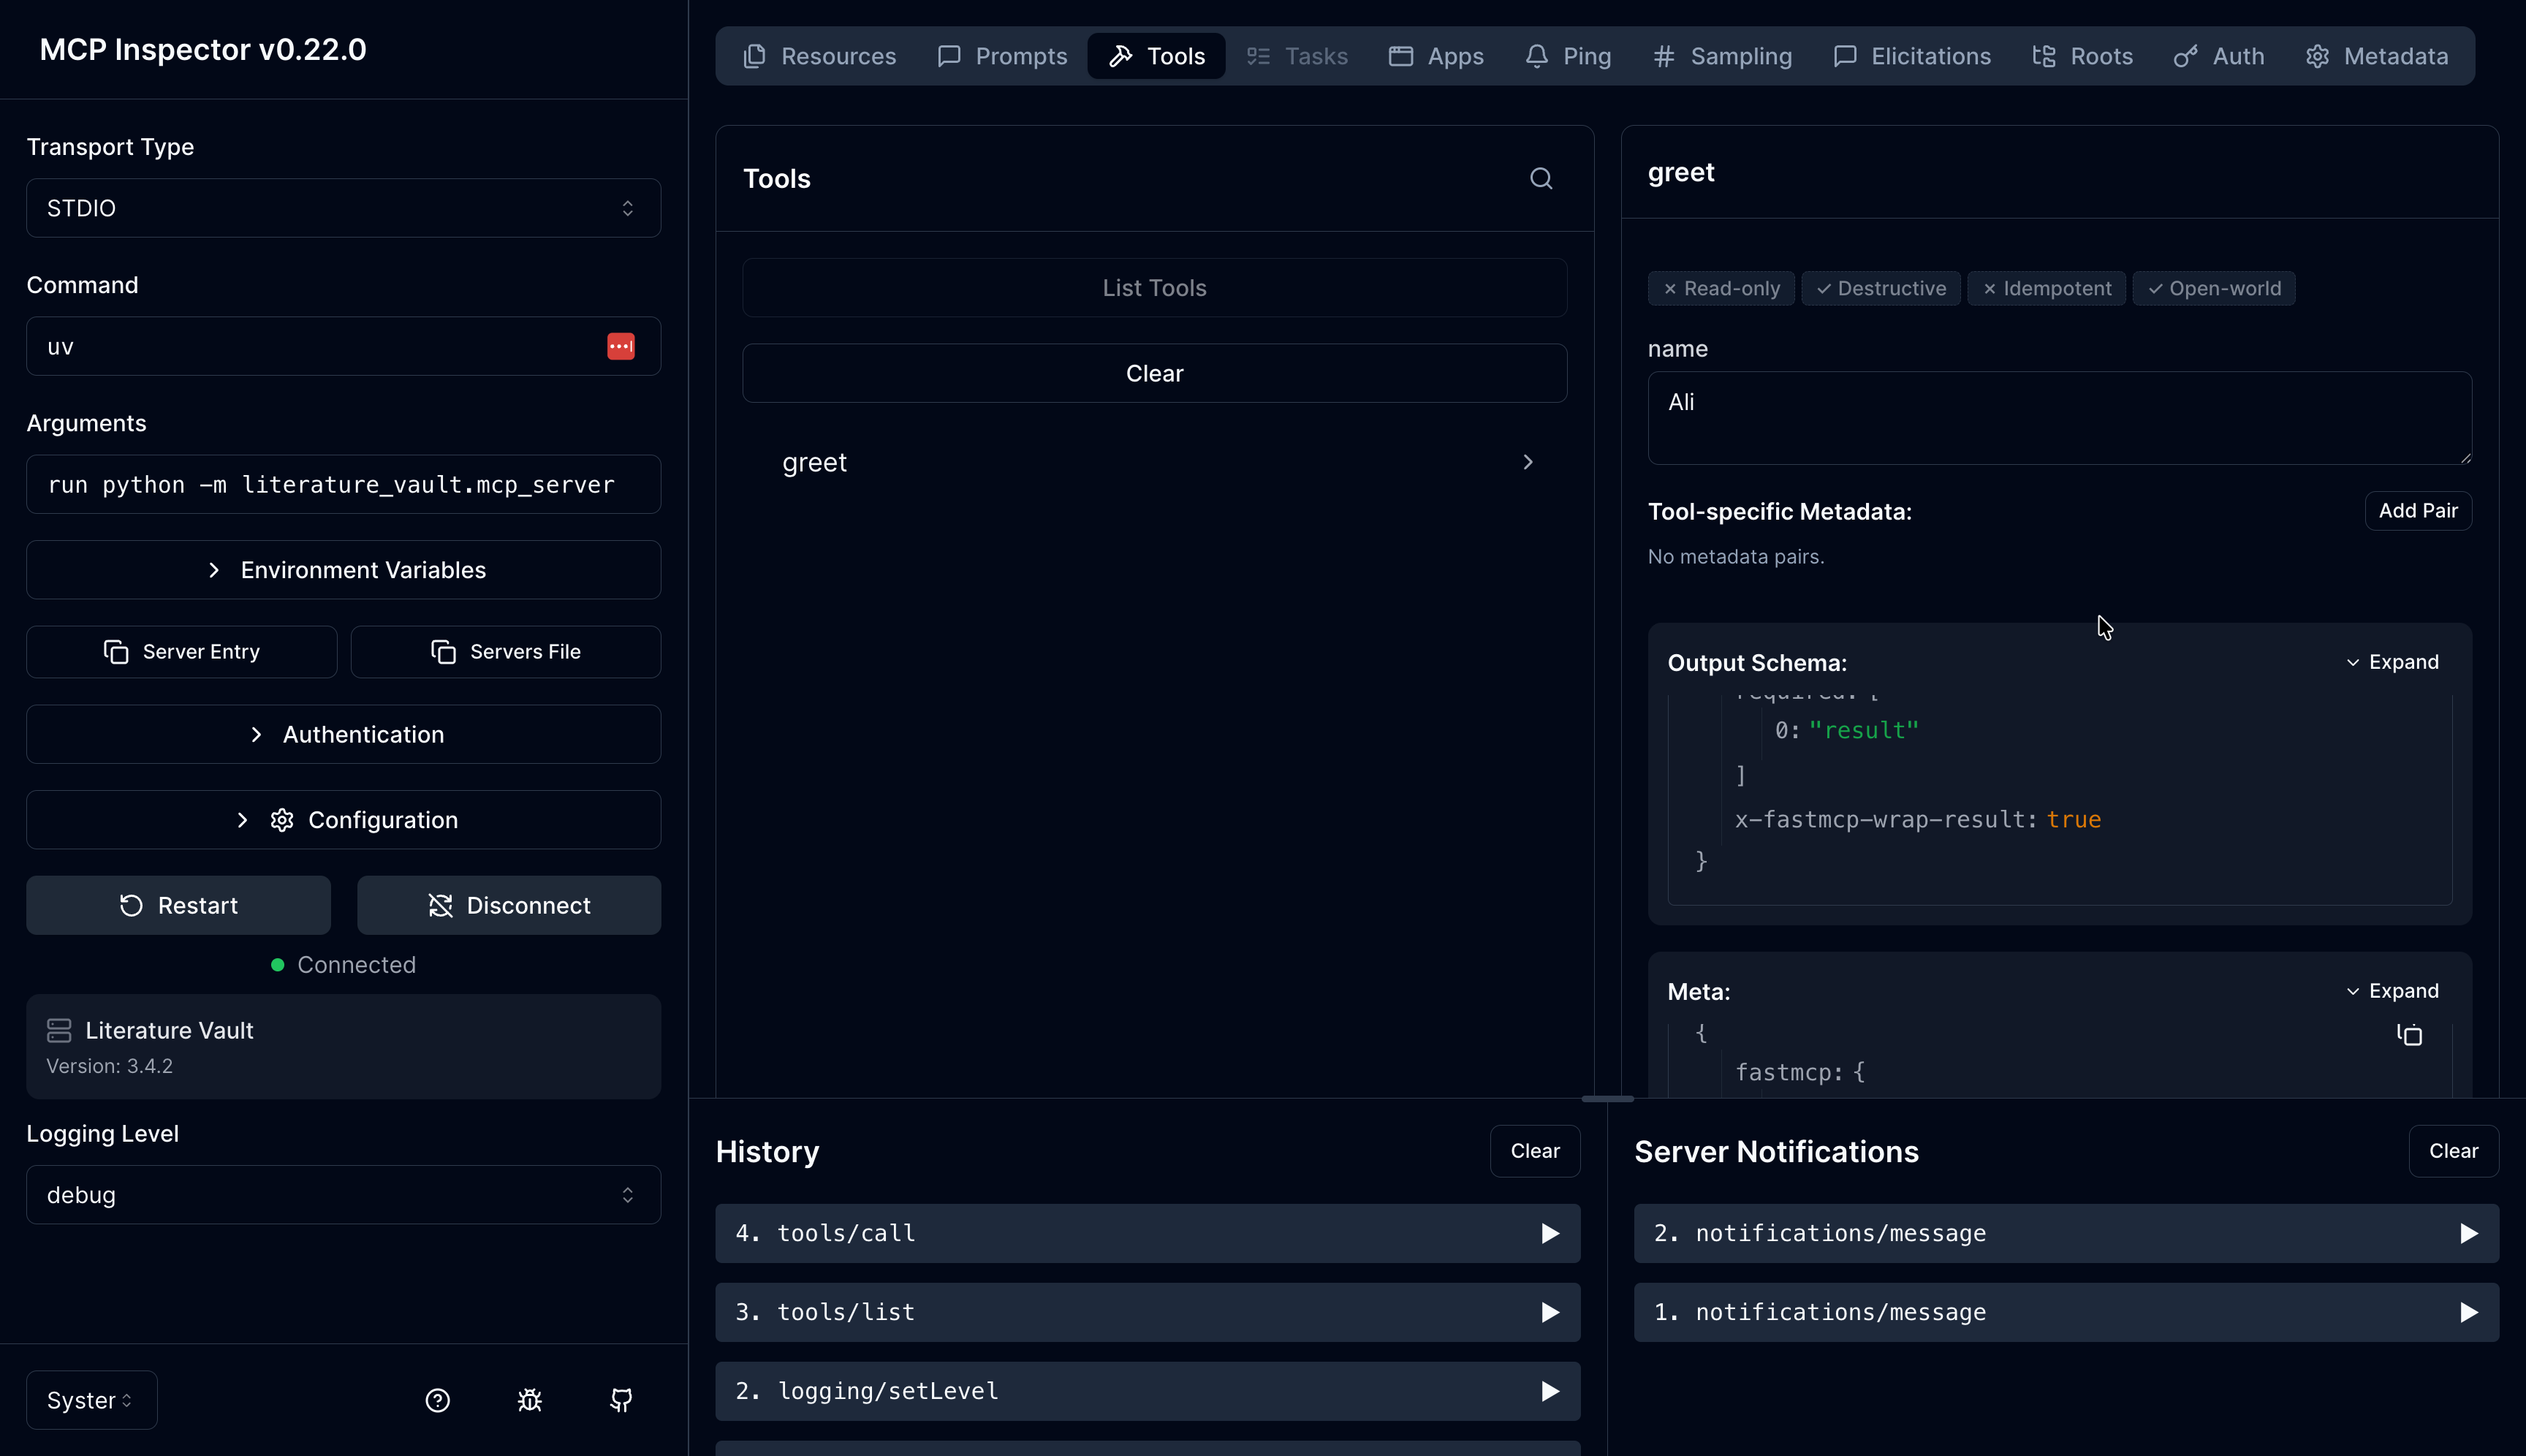
After it connects, use the Inspector to call the tool:
- Open the
Toolstab. - Click
List Toolsif the tools are not shown yet. - Select the
greettool. - Enter
Alifor thenameargument. - Run the tool.
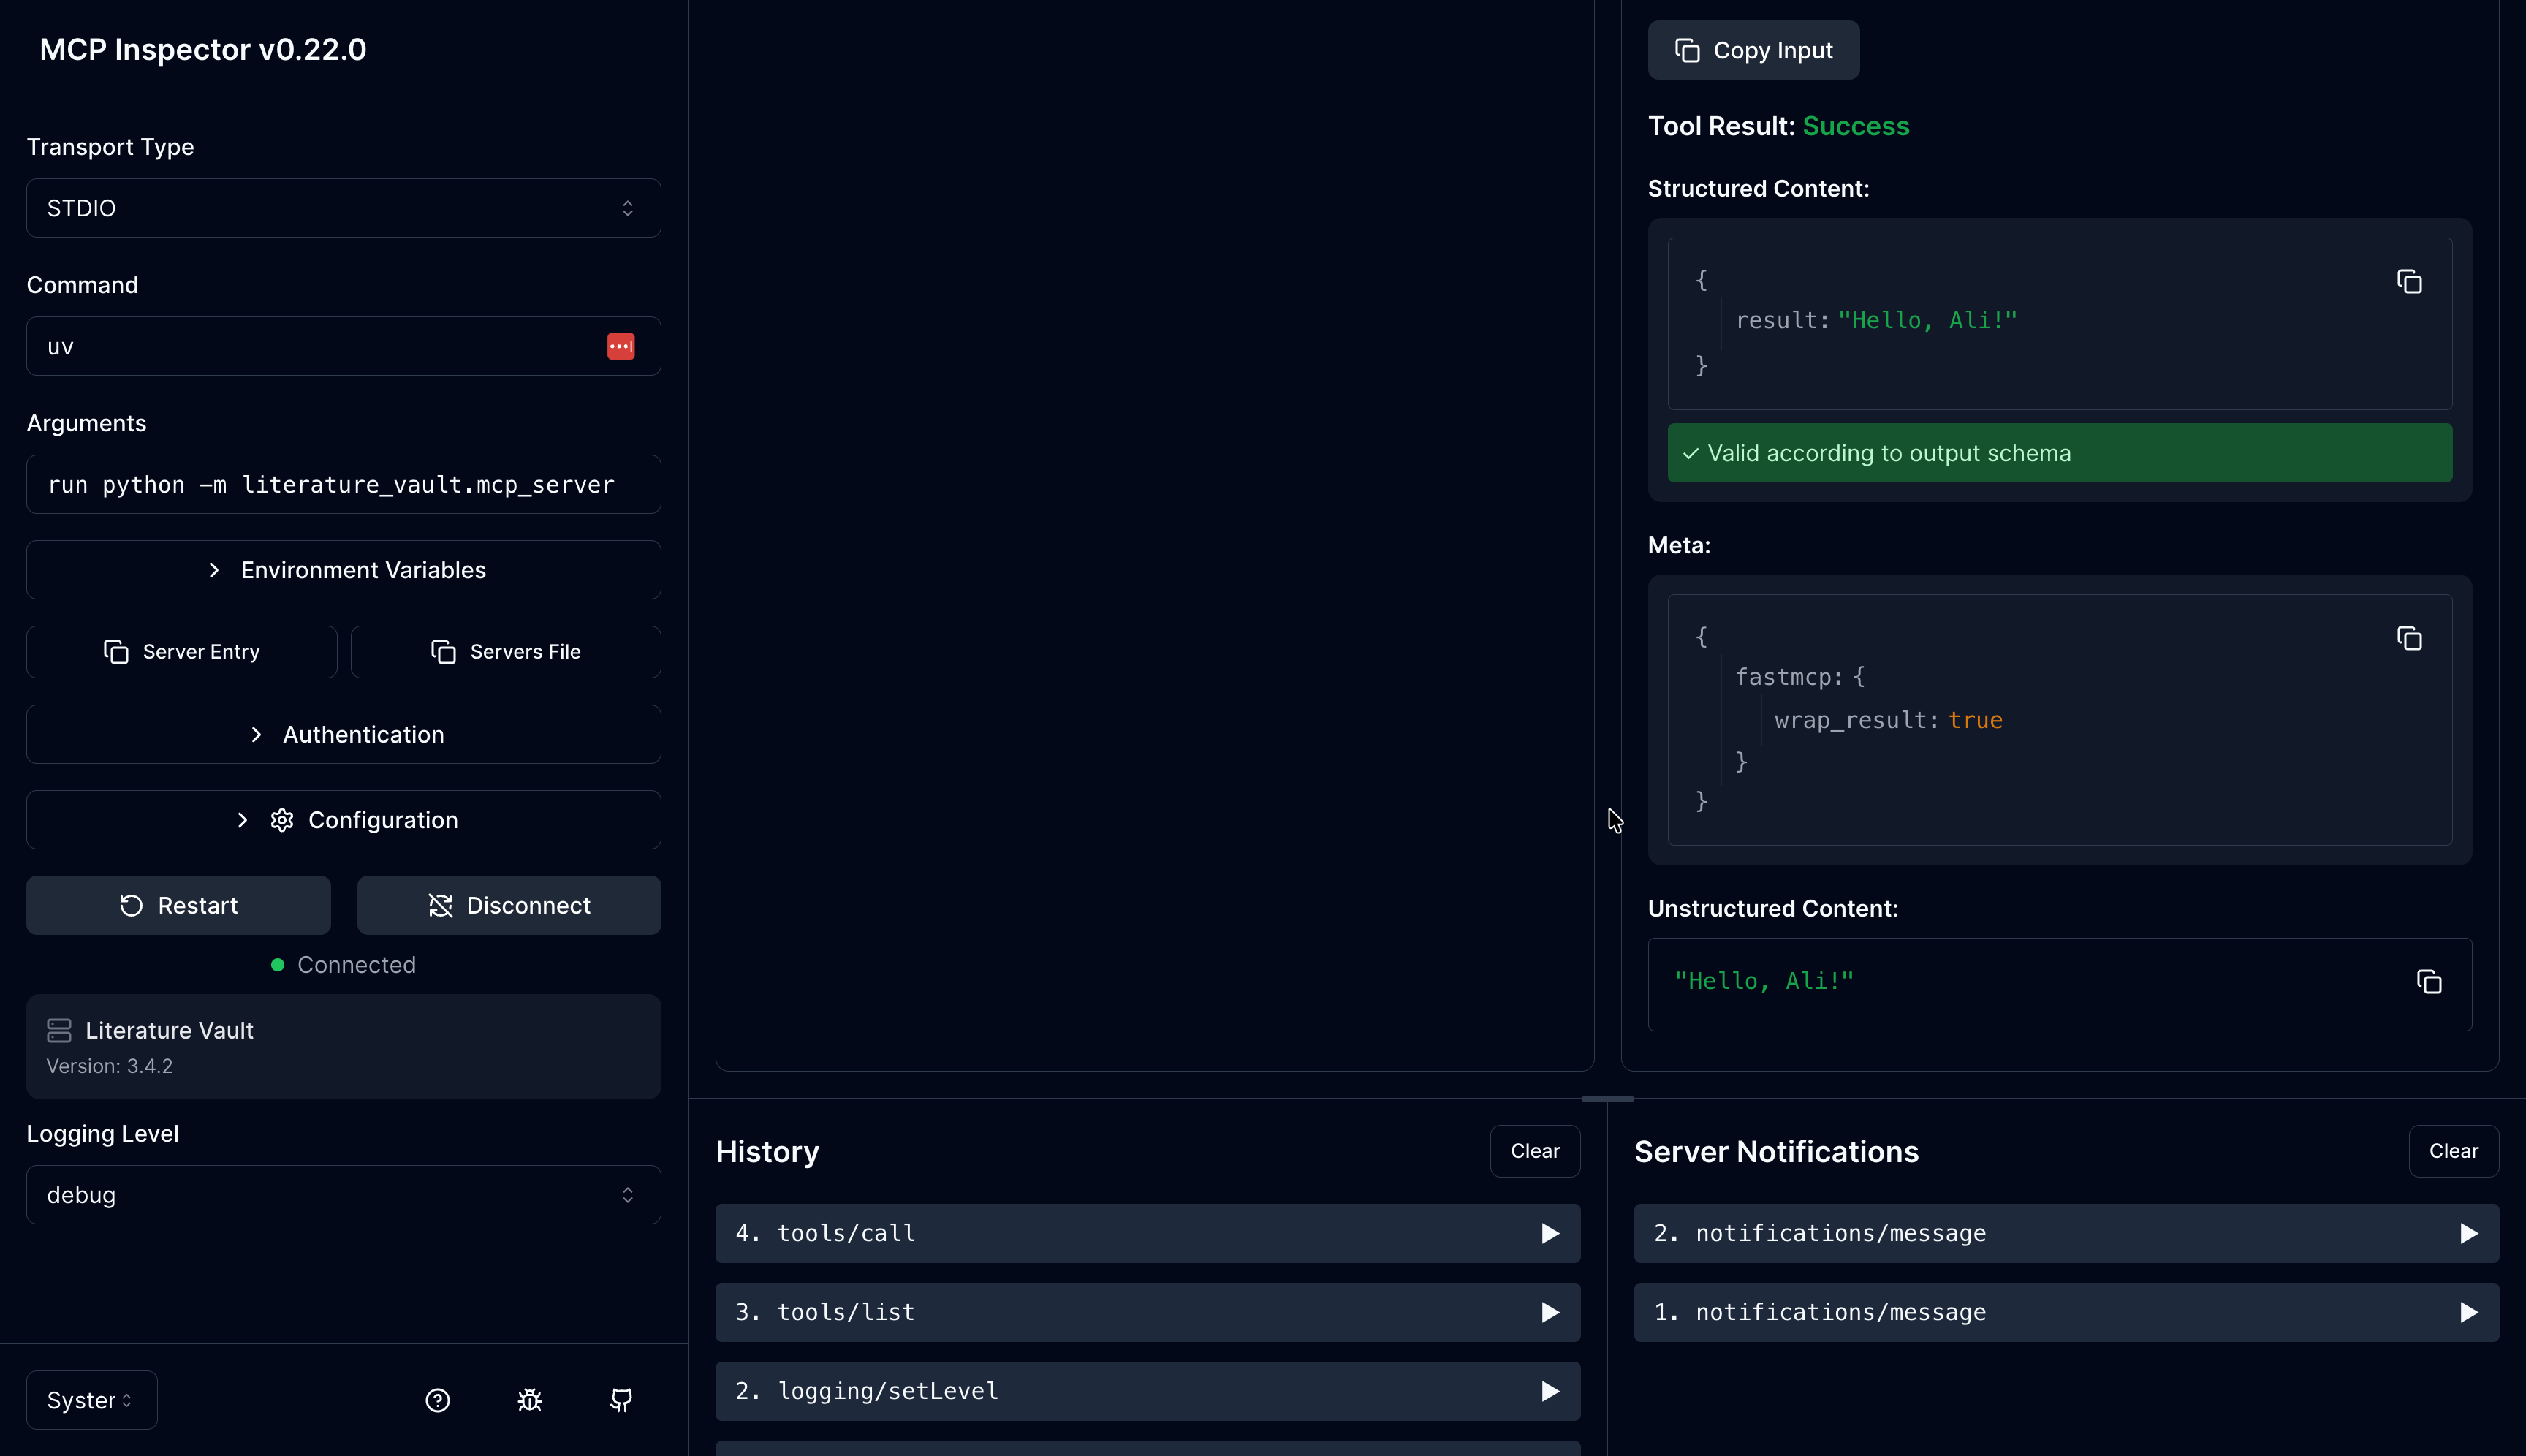
You should see the tool return:
Hello, Ali!
Now the same application logic works through two different interfaces:
uv run lv greet Ali
and:
MCP Inspector -> Tools -> greet
That is the architectural pattern I want for the rest of Literature Vault.
You can stop the MCP server by pressing Ctrl+C in the terminal where you ran the npx command. The Inspector will show that the connection was lost.
Hello Tests
We also installed pytest, so let's add a small test before wrapping up.
Create a new directory called tests. For this project, I want the tests to follow the same boundaries as the source code:
core.pycontains application logic, so it gets its own tests.cli.pycontains the Typer interface, so it gets its own tests.mcp_server.pycontains the MCP interface, so it gets its own tests.
The test directory should look like this:
.
├── src
│   └── literature_vault
│       ├── __init__.py
│       ├── cli.py
│       ├── core.py
│       └── mcp_server.py
└── tests
    ├── test_cli.py
    ├── test_core.py
    └── test_mcp_server.py
This does not need to mechanically copy the full src/literature_vault directory structure yet. For now, a flat tests directory with one test file per source module is simple and readable. If the project grows much larger, I can always move to a nested structure like tests/literature_vault/test_core.py.
Put this in tests/test_core.py:
from literature_vault.core import hello


def test_hello_default() -> None:
    assert hello() == "Hello, world!"


def test_hello_with_name() -> None:
    assert hello("Ali") == "Hello, Ali!"
These tests check the plain Python function directly. They do not know anything about Typer or MCP.
Now put this in tests/test_cli.py:
from typer.testing import CliRunner

from literature_vault.cli import app

runner = CliRunner()


def test_greet_command() -> None:
    result = runner.invoke(app, ["greet", "Ali"])

    assert result.exit_code == 0
    assert result.output == "Hello, Ali!\n"
This test checks the Typer layer. It does not call hello directly. It calls the CLI the way a user would: through the greet command.
Finally, put this in tests/test_mcp_server.py:
import asyncio

from fastmcp import Client

from literature_vault.mcp_server import mcp


def test_greet_tool() -> None:
    async def call_tool() -> str:
        async with Client(mcp) as client:
            result = await client.call_tool("greet", {"name": "Ali"})
            return result.data

    assert asyncio.run(call_tool()) == "Hello, Ali!"
This test checks the MCP layer. The MCP Inspector is great for manual testing, but for an automated test suite we want something that can run in the terminal. FastMCP's test client lets us call the MCP tool directly without opening a browser.
Now run the tests:
uv run pytest
You should see all four tests pass:
4 passed
This is still a tiny test suite, but it is enough for this stage. It verifies the main design decision of this post: the same core function can be used directly, through the CLI, and through MCP. Later, when hello turns into real functionality like add and search, we can keep this same testing pattern.
I have not touched SQLite yet. That is intentional. This post was about getting the Python project, CLI, MCP server, and tests in place. In the next post, I will start the storage layer and bring in the SQLite-related pieces when there is actually something to test against.