Step 5: Adding MongoDB
In the previous posts, we set up a basic Node.js and Express server using TypeScript and organized our project structure. Now, it’s time to integrate MongoDB, a popular NoSQL document database, into our backend stack.
MongoDB is a highly scalable and flexible database that stores data in a JSON-like format called BSON (Binary JSON). It’s a great choice for applications that require dynamic and unstructured data models.
Installing MongoDB Locally
Before connecting to MongoDB from our Node.js application, we must first install and set up MongoDB on our local machine.
Visit the official MongoDB website and follow the installation instructions for your operating system: https://www.mongodb.com/docs/manual/administration/install-community/
Please note, you may encounter challenges with the manual installation. It took me over an hour to install and get the database server running locally. I had to search for several issues and their solutions.
I’ve included this step to demonstrate the challenges of configuring and running a service like a database server without using a containerization solution like Docker. Running MongoDB locally with Docker takes only a few minutes. We will cover this in a later post.
If you’re stuck and can’t install MongoDB locally, a good alternative is to use MongoDB Atlas. This is a cloud-based MongoDB service that requires no installation overhead and offers a free tier to get started. Follow the documentation to get started: https://www.mongodb.com/docs/atlas/getting-started/
We will discuss using MongoDB Atlas for development and production in a later post.
Installing MongoDB Compass
MongoDB Compass is a graphical user interface (GUI) for MongoDB. It provides a visual representation of your MongoDB database. Regardless of whether you have MongoDB installed locally, are running it via Docker, or have created a cloud cluster on MongoDB Atlas, installing Compass locally and connecting it to your MongoDB instance is recommended.
- Follow the official instructions to download and install MongoDB Compass: https://www.mongodb.com/docs/compass/current/install/.
- After installation, follow these instructions to connect Compass to a MongoDB instance: https://www.mongodb.com/docs/compass/current/connect/.
Establishing a connection usually requires a connection URI. For a MongoDB instance running locally, this URI is commonly mongodb://localhost:27017.
Using MongoDB Compass, you can connect to multiple MongoDB instances (local, containerized, cloud). With Compass, you can visually explore your databases, interact with your data, run ad-hoc queries, and more, all within the Compass interface.
Connecting to MongoDB with Mongoose
While MongoDB Compass provides a convenient graphical interface for interacting with MongoDB databases, it is primarily intended for manual data exploration and management. When building a Node.js application, it is recommended to use the MongoDB driver to programmatically connect to the database. This allows the application to execute queries, perform CRUD operations, and interact with the database as part of its normal operation.
Although we can interact with MongoDB directly using its official drivers, it’s often more convenient to use an Object Data Modeling (ODM) library like Mongoose. Mongoose provides a higher-level abstraction over the MongoDB driver, making it easier to define data schemas, create models, and perform CRUD operations.
-
Install Mongoose: In your project directory, run the following command to install Mongoose:
npm install mongoose -
Create a MongoDB Connection: In the
srcfolder, create a new file calleddatabase.tsand add the following code:import mongoose from "mongoose"; // Adjust host and port if different from default values const MONGODB_URI = "mongodb://localhost:27017/your-database-name"; const connectDB = async () => { try { await mongoose.connect(MONGODB_URI); console.log("Connected to MongoDB"); } catch (error) { console.error("Error connecting to MongoDB:", error); throw error; // Rethrow to handle it in the caller } }; export default connectDB; export { mongoose }; // Export the mongoose instance for use in other files- Replace
'your-database-name'with the name of the database you want to use. If the database doesn’t exist, MongoDB will create it for you. - Replace
mongodb://localhost:27017with the connection URI for your MongoDB Atlas cluster or your Docker container if you’re not running MongoDB locally. You can find the connection URI in the MongoDB Atlas dashboard or in your Docker configuration.
- Replace
-
Import the MongoDB Connection: Refactor your
server.tsfile as follows to ensure the server tries to connect to MongoDB before starting:import express, { Express, Request, Response } from "express"; import connectDB from "./database"; const app: Express = express(); const port = 3000; const startServer = async () => { try { await connectDB(); app.listen(port, () => { console.log(`Server is running on port ${port}`); }); } catch (error) { console.error("Failed to start due to MongoDB connection error"); } }; app.get("/", (req: Request, res: Response) => { res.send("Hello, World!"); }); startServer();This ensures the server establishes a MongoDB connection when it starts.
If you start the server with the npm run start command, the following message will appear in the terminal:
Connected to MongoDB
Server is running on port 3000Defining a Data Model with Mongoose
This tutorial series does not cover working with MongoDB and Mongoose in detail. However, to demonstrate, we’ll create a data model in this section. In the subsequent sections, we’ll add sample data to it and retrieve that data from the server.
Start by creating a new file named models/User.ts in the src folder and define a simple User model:
import mongoose, { Schema, Document } from "mongoose";
interface IUser extends Document {
name: string;
email: string;
}
const UserSchema: Schema = new Schema({
name: { type: String, required: true },
email: { type: String, required: true, unique: true },
});
const User = mongoose.model<IUser>("User", UserSchema);
export default User;This code defines a User model with name and email fields, utilizing Mongoose’s schema and model system.
Seeding the Database
To effectively demonstrate the retrieval of user data from MongoDB, we’ll create a seeding script to populate the database with a few user records.
-
Create the Seeding Script: Create a new file named
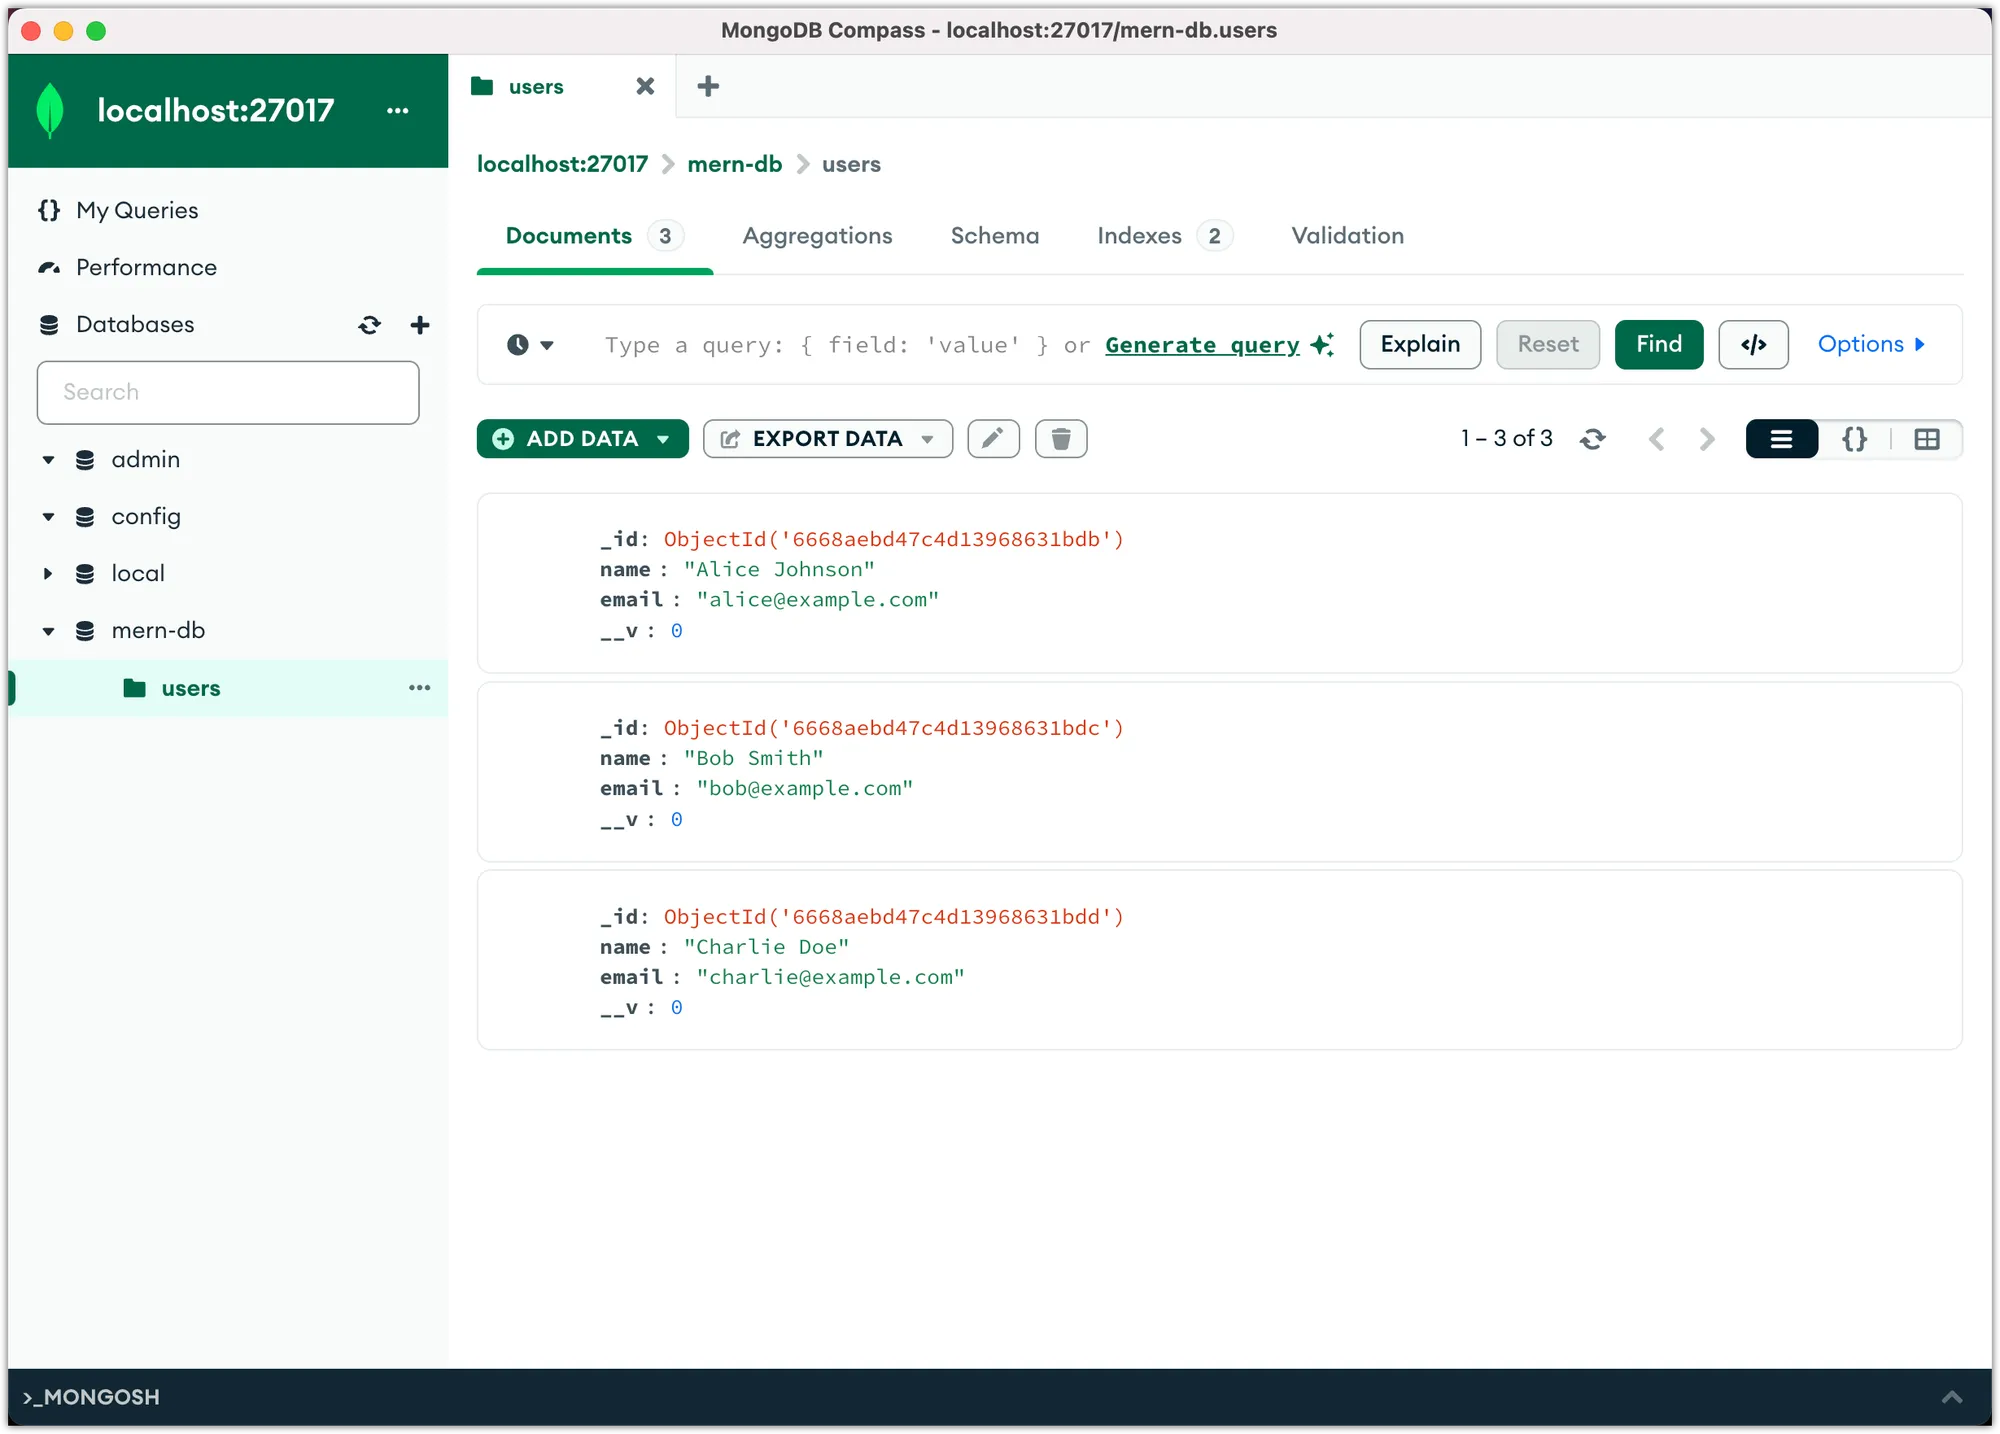
scripts/seedDB.tsin thesrcfolder with the following content:import connectDB, { mongoose } from "../database"; import User from "../models/User"; const users = [ { name: "Alice Johnson", email: "alice@example.com" }, { name: "Bob Smith", email: "bob@example.com" }, { name: "Charlie Doe", email: "charlie@example.com" }, ]; async function seedDB() { try { await connectDB(); await User.deleteMany({}); await User.insertMany(users); console.log("Database seeded!"); } catch (error) { console.error("Error seeding database:", error); } finally { mongoose.connection.close(); console.log("Connection closed"); } } seedDB();This script clears the User collection and inserts a set of predefined users.
-
Run the Seeding Script: You can do this by adding a new script to your
package.jsonfile:"scripts": { "seed": "tsc && node dist/scripts/seedDB.js" },Next, execute this script using Node.js to populate your database:
npm run seedThis should output the following:
Connected to MongoDB Database seeded! Connection closed
If you explore the database in MongoDB Compass, you should see the sample users.
Retrieving User Data
Next, we’ll add a GET endpoint to retrieve and display the list of users. This will help in testing the retrieval functionality and ensure that our MongoDB integration is working correctly.
-
Import the User Model: Modify your
server.tsfile to include a new import statement:import User from "./models/User"; -
Add a GET Endpoint for Users: Modify your
server.tsfile to include a new route that fetches users:app.get("/users", async (req: Request, res: Response) => { try { const users = await User.find({}); res.json(users); } catch (error) { console.error("Error retrieving users:", error); res.status(500).send("Error retrieving users"); } });This endpoint retrieves all users from the database and sends them back as JSON.
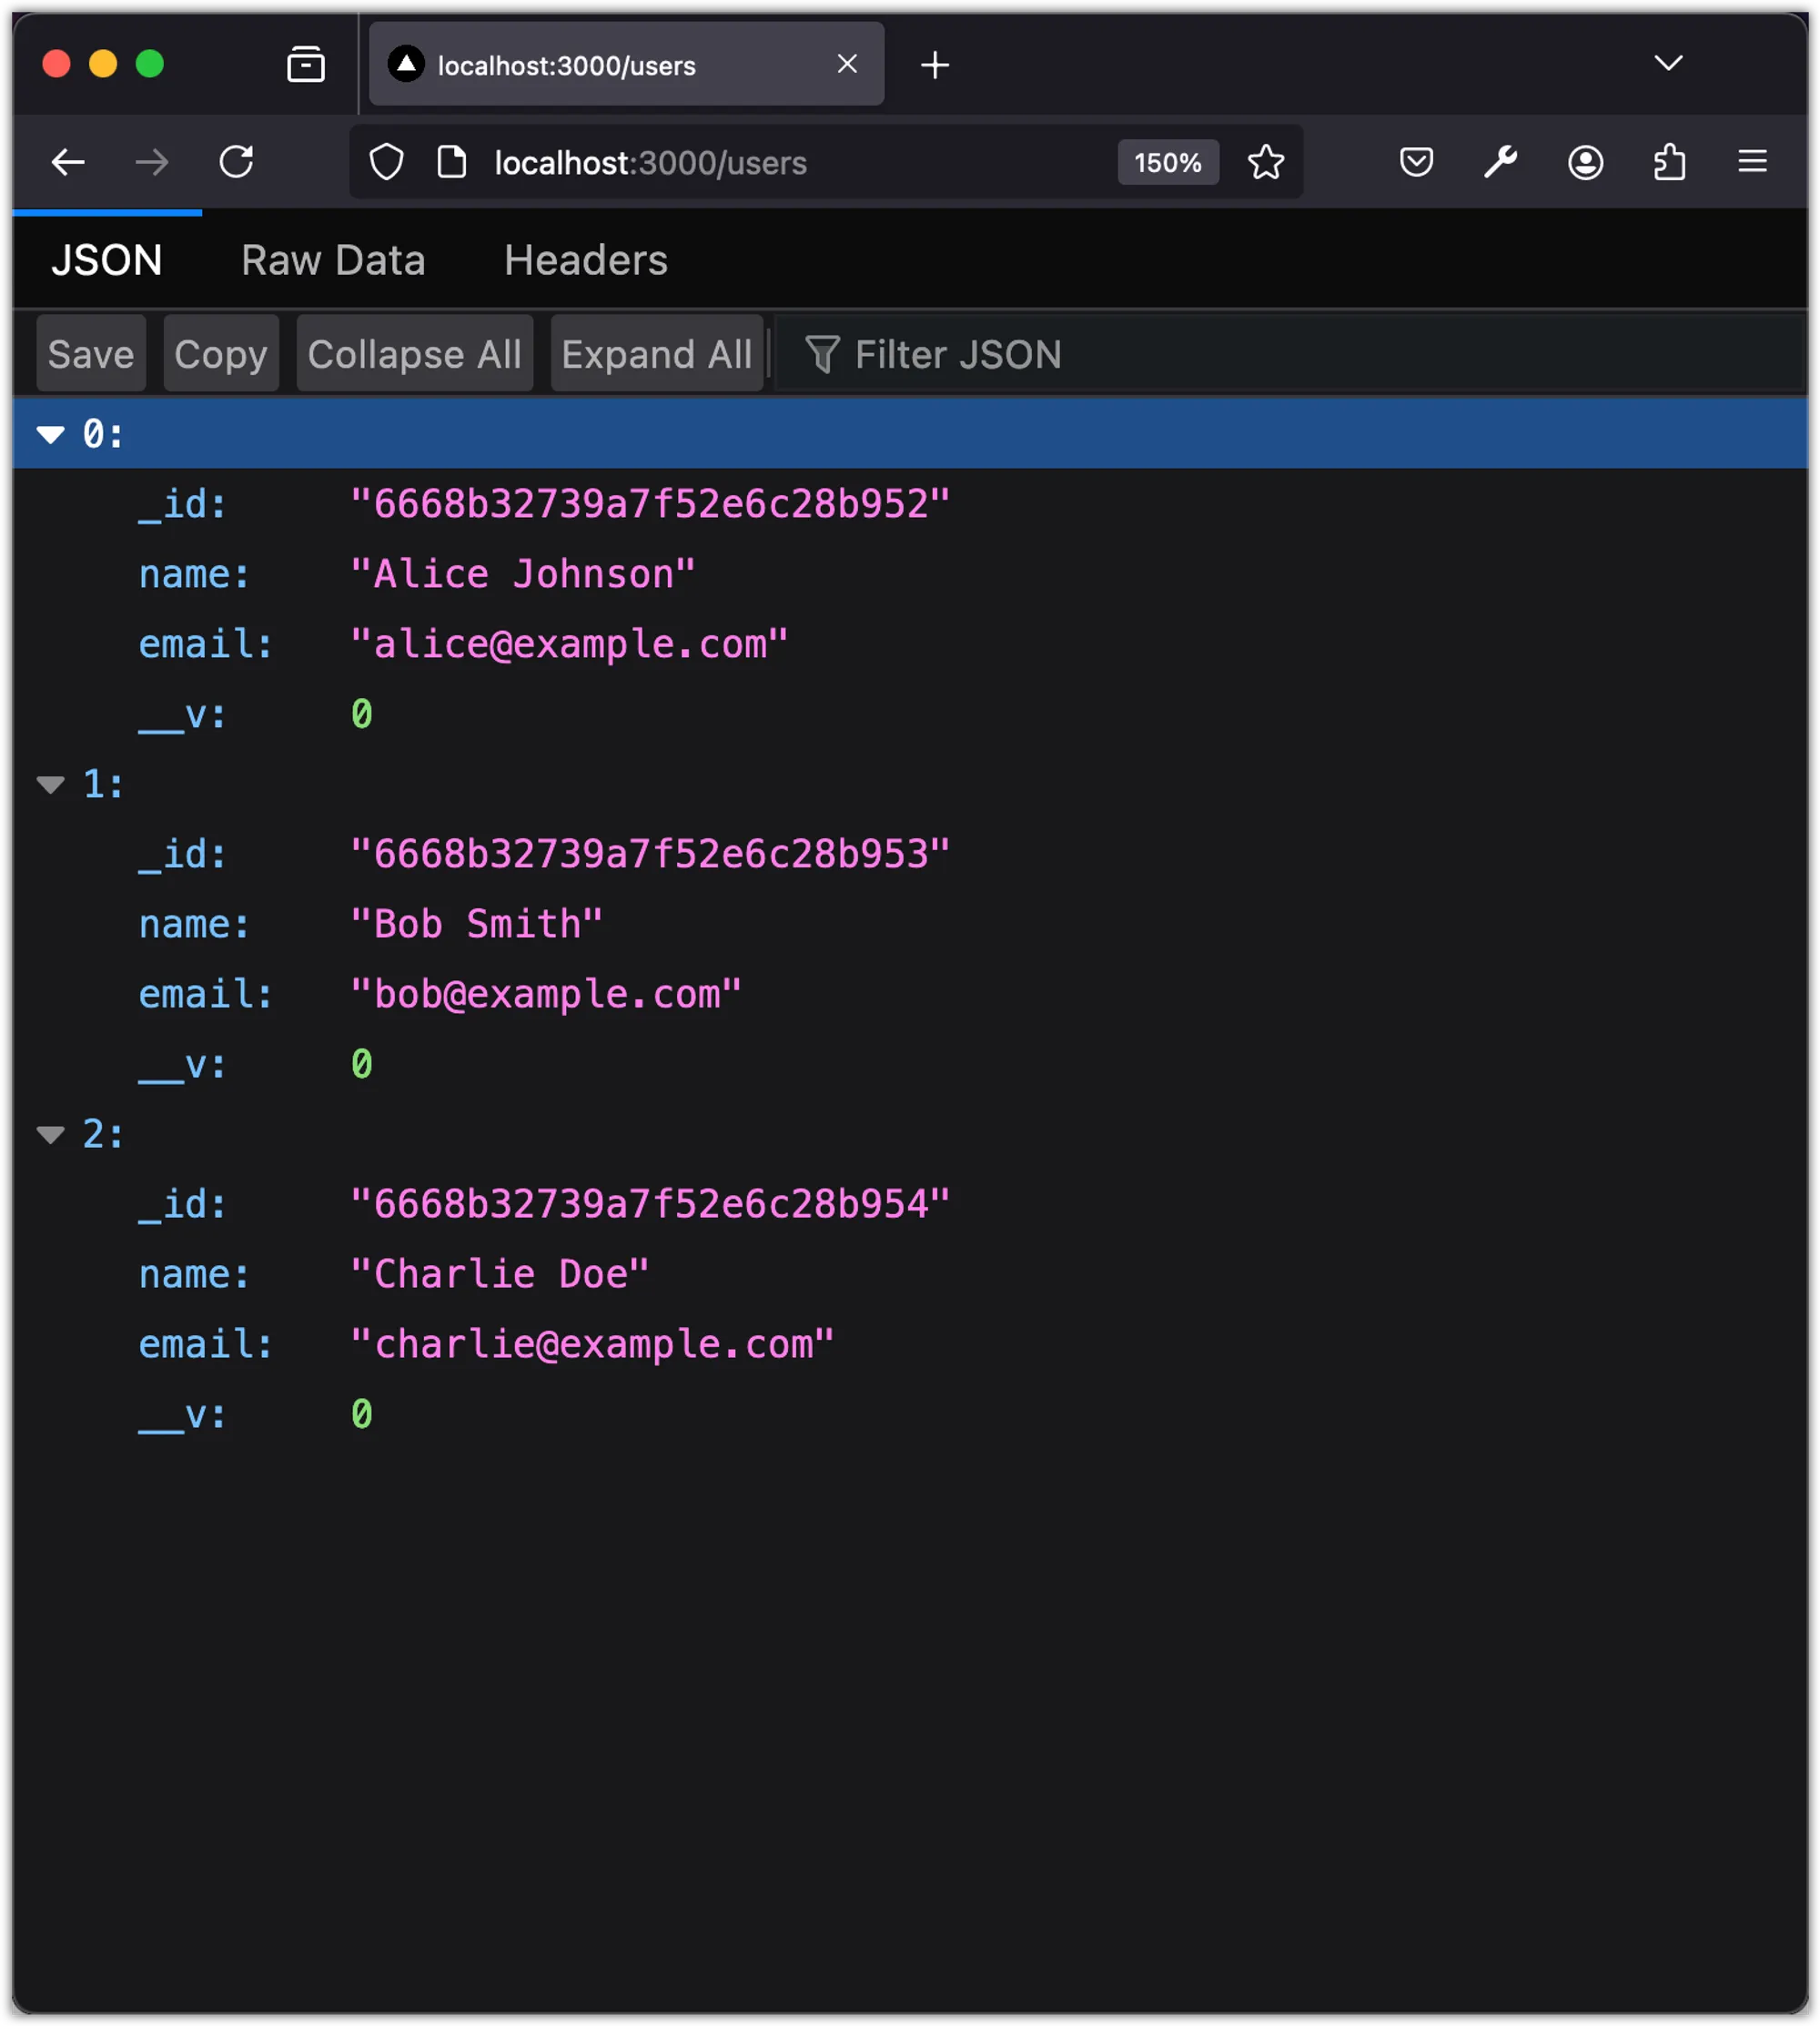
Now, when you run npm run start and visit http://localhost:3000/users in your browser or use a tool like Postman, you should see a list of users. This confirms that both your MongoDB setup and user retrieval functionality are correctly implemented.
In this post, we learned how to install MongoDB locally and connect to it from our Node.js application using Mongoose. We also defined a simple data model, seeded the database, and created a route for testing the MongoDB integration.
In the next post, we’ll explore how to add Redis to our backend stack for caching and other use cases.