Step 6: Adding Redis
In the previous post, we integrated MongoDB into our backend stack and learned how to define data models, seed the database, and retrieve data using Mongoose. Now, it’s time to add Redis, an in-memory data store, to our stack for caching and other use cases.
Redis is an open-source, in-memory data structure store that can be used as a database, cache, and message broker. It’s known for its lightning-fast performance, making it an excellent choice for applications that require low-latency data access and caching.
Installing Redis Locally
Before using Redis in our Node.js application, we must first install and set up Redis on our local machine. There are several ways to do this, one of which is by running a Docker container. We will discuss this method later.
For now, visit the official Redis website and follow the installation instructions for your operating system: https://redis.io/docs/latest/get-started/.
After installing Redis, start the Redis server and ensure it runs in the background. Once Redis is running, test it using the redis-cli command. Information on using the CLI can be found here: https://redis.io/docs/latest/develop/connect/cli/.
If this step proves challenging, consider creating a free account on Upstash and using their cloud-based Redis service for now. You can consult their documentation for guidance on setting up and connecting to a Redis instance: https://upstash.com/docs/redis/overall/getstarted.
Installing Redis Insight
Redis Insight is a graphical user interface (GUI) for Redis Stack. It assists you in visualizing data stored in your Redis instance. It supports CLI interaction and can be connected to a Redis instance running locally, within a Docker container, or hosted in the cloud through various cloud computing providers.
- Follow the official instructions to download and install Redis Insight: https://redis.io/insight/.
- After installation, use these instructions to connect Insight to a Redis instance: https://redis.io/docs/latest/develop/connect/insight/.
Establishing a connection is fairly simple. If you’re running Redis locally, the Insight app will automatically detect it (on localhost and port 6379) as soon as you open the app.
Integrating Redis with Node.js
Now that we have Redis installed and running, let’s integrate it into our Node.js application.
-
Install the Redis Client: In your project directory, run the following command to install the
redispackage, which is a Redis client for Node.js:npm install redis -
Create a Redis Connection: In the
srcfolder, create a new file calledredis.tsand add the following code:import { createClient } from 'redis'; // Adjust host and port if different from default values const REDIS_URL = 'redis://localhost:6379'; const client = createClient({ url: REDIS_URL, }); // Connect to Redis const connectRedis = async () => { try { await client.connect(); console.log('Connected to Redis'); } catch (error) { console.error('Error connecting to Redis:', error); throw error; // Rethrow to handle it in the caller } }; client.on('error', (err) => console.log('Redis Client Error', err)); export default connectRedis; export { client }; // Export the client instance for use in other files- Client Configuration: It sets up the Redis client using the
redispackage. Theurlparameter specifies the connection string which includes the Redis server location. If your Redis server requires a password or is hosted remotely, you’d include those details in the URL. - Connection Function: The
connectRedisfunction initializes the connection to the Redis server. It also handles error logging and rethrows errors so they can be handled at the caller level, just like your MongoDB setup. - Event Listener for Errors: An event listener logs any error that might occur after the initial connection is established.
- Client Configuration: It sets up the Redis client using the
-
Import the
connectRedis: In yourserver.tsfile, import the Redis connection at the top of the file:import connectRedis from "./redis"; -
Connect to Redis: In your
server.tsfile, update thestartServerfunction as follows:const startServer = async () => { try { await connectDB(); + await connectRedis(); app.listen(port, () => { console.log(`Server is running on port ${port}`); }); } catch (error) { console.error("Failed to start due to MongoDB connection error"); } };This will ensure that the Redis connection is established when the server starts.
If you start the server with the npm run start command, the following message should appear in the terminal:
Connected to MongoDB
Connected to Redis
Server is running on port 3000Using Redis for Caching
One of the most common use cases for Redis is caching. Let’s create a simple caching example to demonstrate how Redis can be used for this purpose.
Let’s update the route handler for getting users as follows:
app.get("/users", async (req: Request, res: Response, next: NextFunction) => {
try {
const key = `__express__${req.originalUrl}`; // Create a key for the request
const cachedData = await client.get(key); // Check if the data is cached
if (cachedData) {
console.log("Serving from cache");
return res.send(JSON.parse(cachedData));
}
// Fetch users from the database
const users = await User.find({});
console.log("Serving from MongoDB");
// Cache the response
await client.set(key, JSON.stringify(users), {
EX: 3600 // Cache for 1 hour
});
console.log("Data cached");
res.json(users);
} catch (error) {
console.error("Error retrieving users:", error);
res.status(500).send("Error retrieving users");
}
});When a request is made to this endpoint, the application checks if the requested data is already in the Redis cache. If it is, the cached data is returned, saving the time and resources it would take to retrieve the data from the database. If the data is not in the cache, the application retrieves the data from the MongoDB database, caches it in Redis for future use, and then returns it. The caching process involves creating a unique key for the request, storing the data under that key in the Redis cache, and setting an expiration time for the cached data (1 hour in this case). If any errors occur during this process, an error message is returned.
Now, when you run npm run start and visit http://localhost:3000/users in your browser or use a tool like Postman, the first request will fetch the users from the database and cache the response in Redis. Subsequent requests to the same URL will be served from the Redis cache, resulting in faster response times.
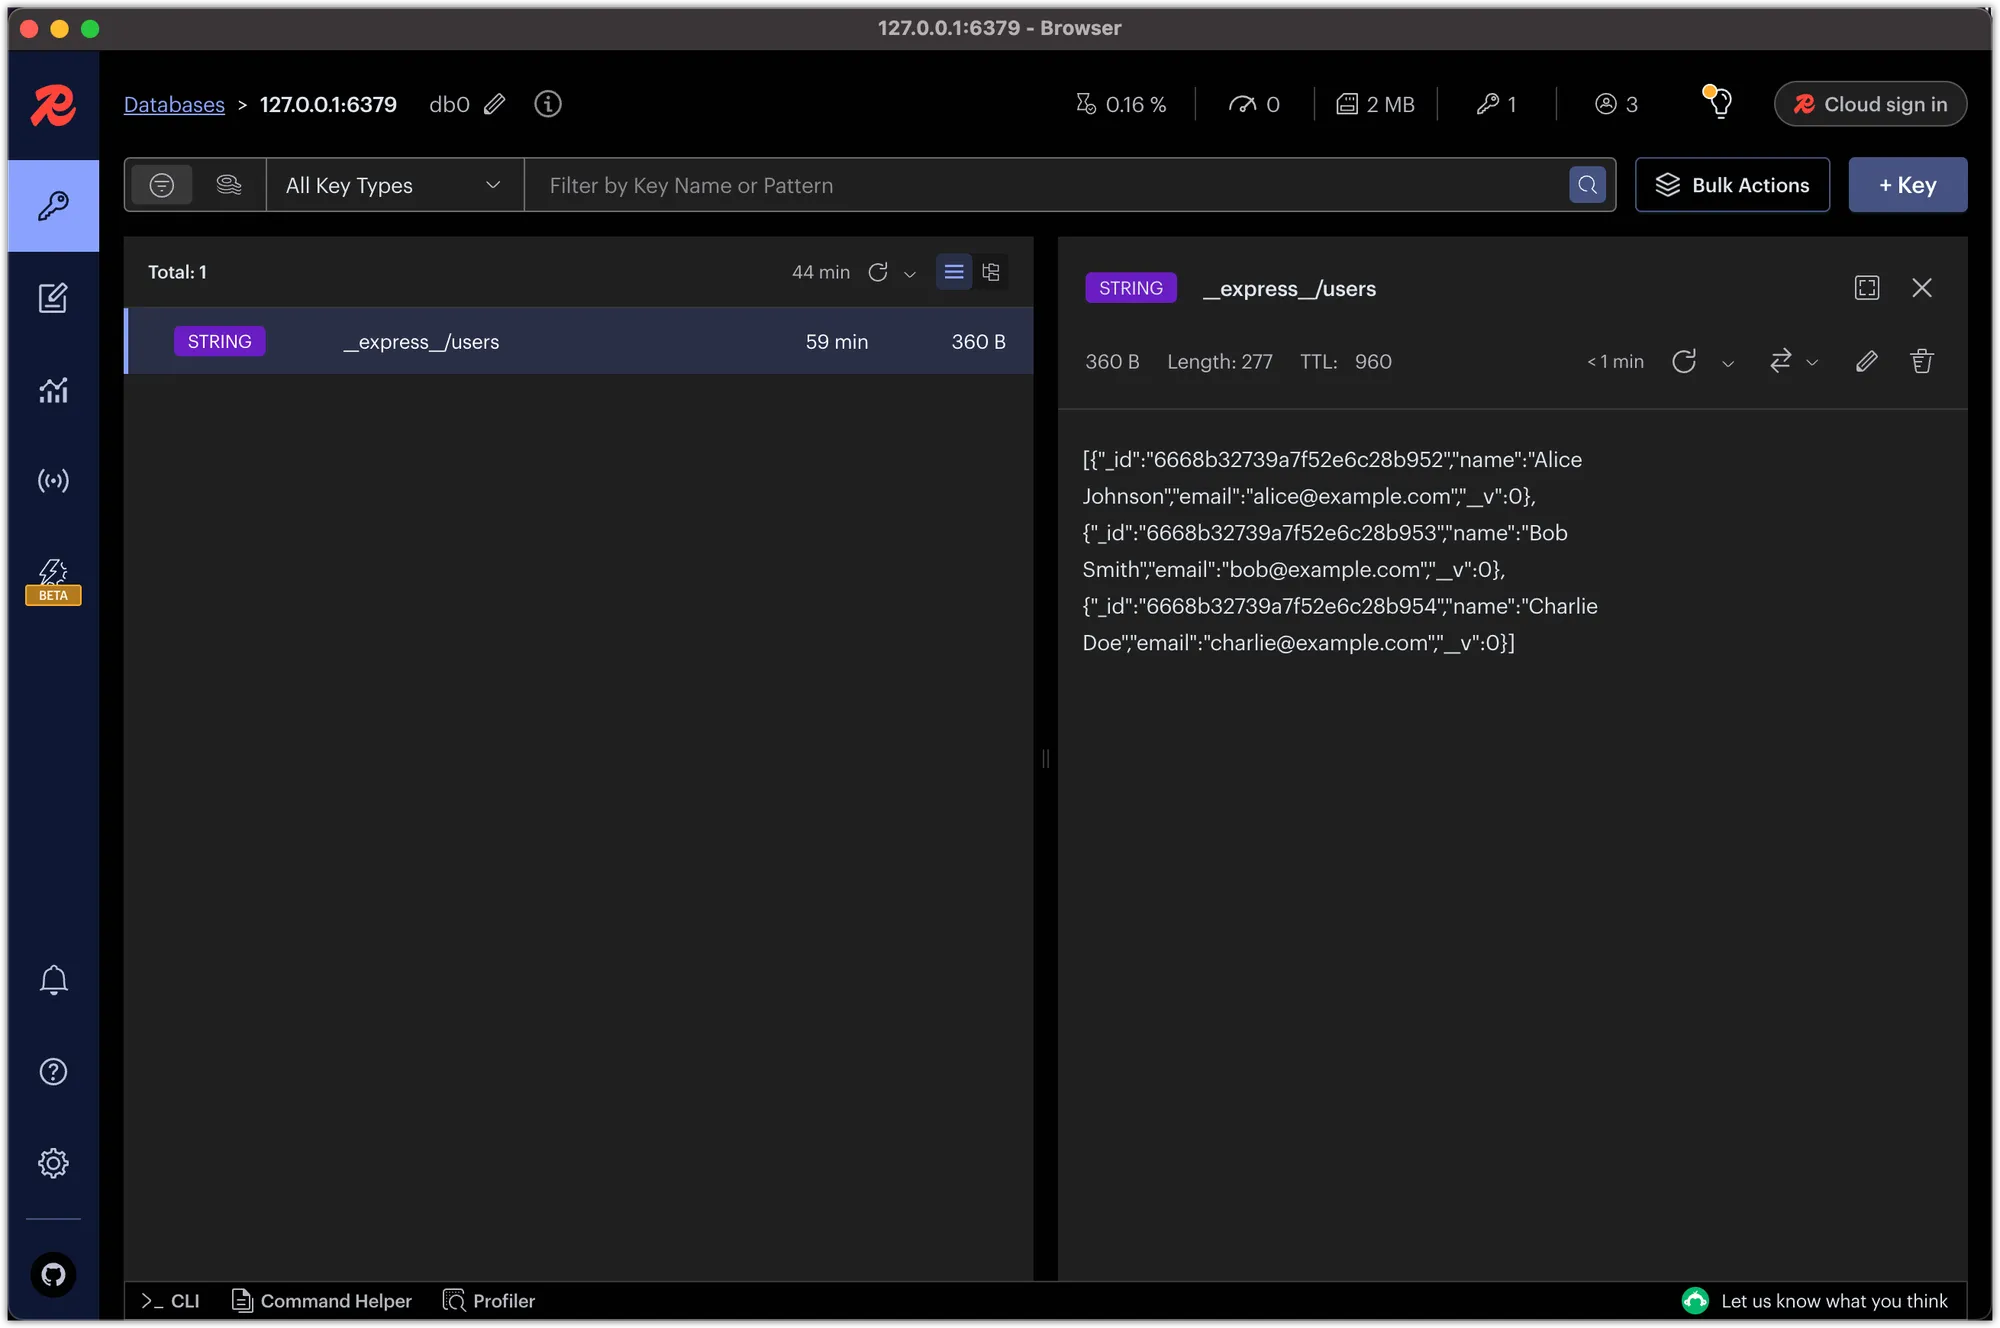
If you explore the Redis instance in Redis Insight, you should see the sample users.
In this post, we learned how to install Redis locally and integrate it into our Node.js application using the redis package. We also implemented a simple caching mechanism using Redis to demonstrate one of its common use cases.
Redis can be used for various other purposes, such as session management, real-time communication, and job queuing. In the next post, we’ll explore how to dockerize our application, including the Node.js server, MongoDB, and Redis, for easier deployment and development.