Step 7: Using Docker to Run MongoDB and Redis
In previous steps, we installed MongoDB and Redis on our local development machines. While this method works for individual local development, it can become burdensome when attempting to set up in different environments, such as when sharing the project with other developers. Docker resolves this issue by enabling us to run applications like MongoDB and Redis in self-contained, lightweight containers. These containers can operate on any machine capable of running Docker containers.
What is Docker?
Docker is an open-source platform that enables developers to build, deploy, and run applications inside containers. A container is a lightweight, standalone, executable package that includes everything needed to run an application, including the code, runtime, system tools, and libraries.
Using Docker offers several benefits:
- Consistent Environments: Docker containers ensure that your application runs consistently across different environments (development, staging, production) by encapsulating all dependencies.
- Portability: Docker containers are highly portable and can run on any machine with Docker installed, regardless of the host operating system or infrastructure.
- Resource Efficiency: Containers are lightweight and share the host machine’s kernel, making them more resource-efficient than traditional virtual machines.
- Scalability: Docker containers can be easily scaled up or down to meet changing demands.
To get started with Docker, you’ll need to install Docker Desktop on your machine. Follow the official installation instructions for your operating system: https://docs.docker.com/get-docker/.
When working with Docker, there are a few terms you should be familiar with:
- Image: A read-only template used to create containers. Images are built from a set of instructions contained in a Dockerfile.
- Container: A runnable instance of an image. It represents a lightweight, standalone, and executable package that includes everything needed to run an application.
- Dockerfile: A text file that contains a set of instructions for building a Docker image. It specifies the base image, dependencies, environment variables, and other configurations needed to run the application.
- Docker Compose: A tool for defining and running multi-container Docker applications. It uses a YAML file to configure the application’s services, networks, and volumes.
- Volume: A Docker volume is a persistent data storage mechanism that allows data to persist beyond the lifetime of a container.
- Port Mapping: Docker containers run in isolation, so you need to map container ports to host machine ports to access services running inside the container.
- Docker Hub: A registry that hosts official and community-contributed Docker images. You can find images for various applications, databases, and tools on Docker Hub.
Using the MongoDB Docker Image
Instead of installing MongoDB locally, we can run it as a Docker container. Docker Hub is a registry that hosts official and community-contributed Docker images, including the official MongoDB image.
-
Pull the MongoDB Image: Open a terminal or command prompt and run the following command to pull the latest MongoDB image from Docker Hub:
docker pull mongo -
Run the MongoDB Container: Once the image is downloaded, you can run a MongoDB container with the following command:
docker run -d --name mongodb -p 27018:27017 mongoThis command initiates a new MongoDB container in detached mode (
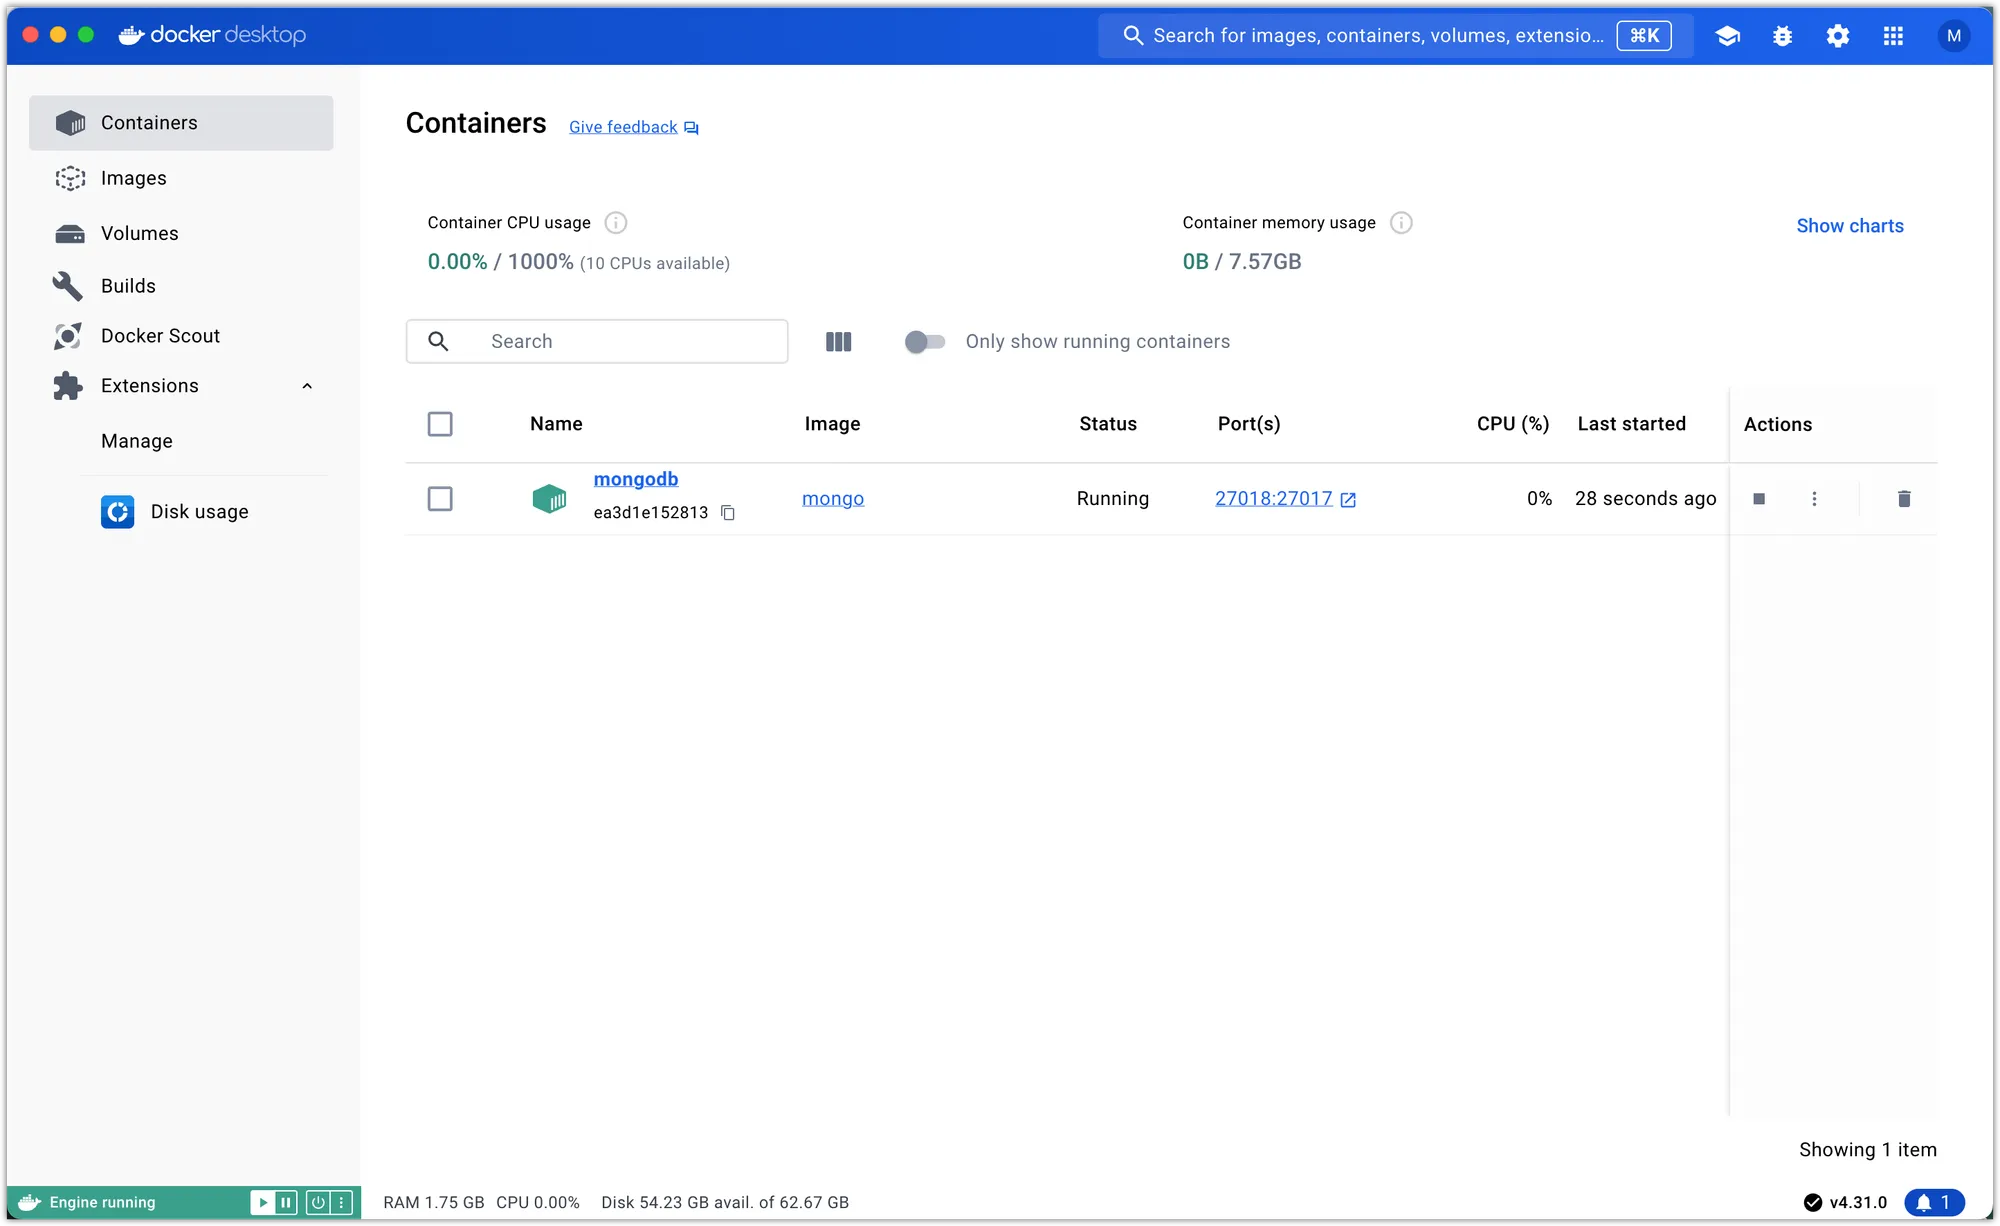
-d), assigns it the namemongodb, and maps the container’s port27017to port27018on the host (your) machine. It is more common to map the container’s port to the same port on the host machine, but we chose27018to avoid conflicts with a locally installed MongoDB instance. The port was changed under the assumption that, following my previous instructions, you have MongoDB installed and running on port 27017.When you open Docker Desktop, you should see the MongoDB container in operation.
-
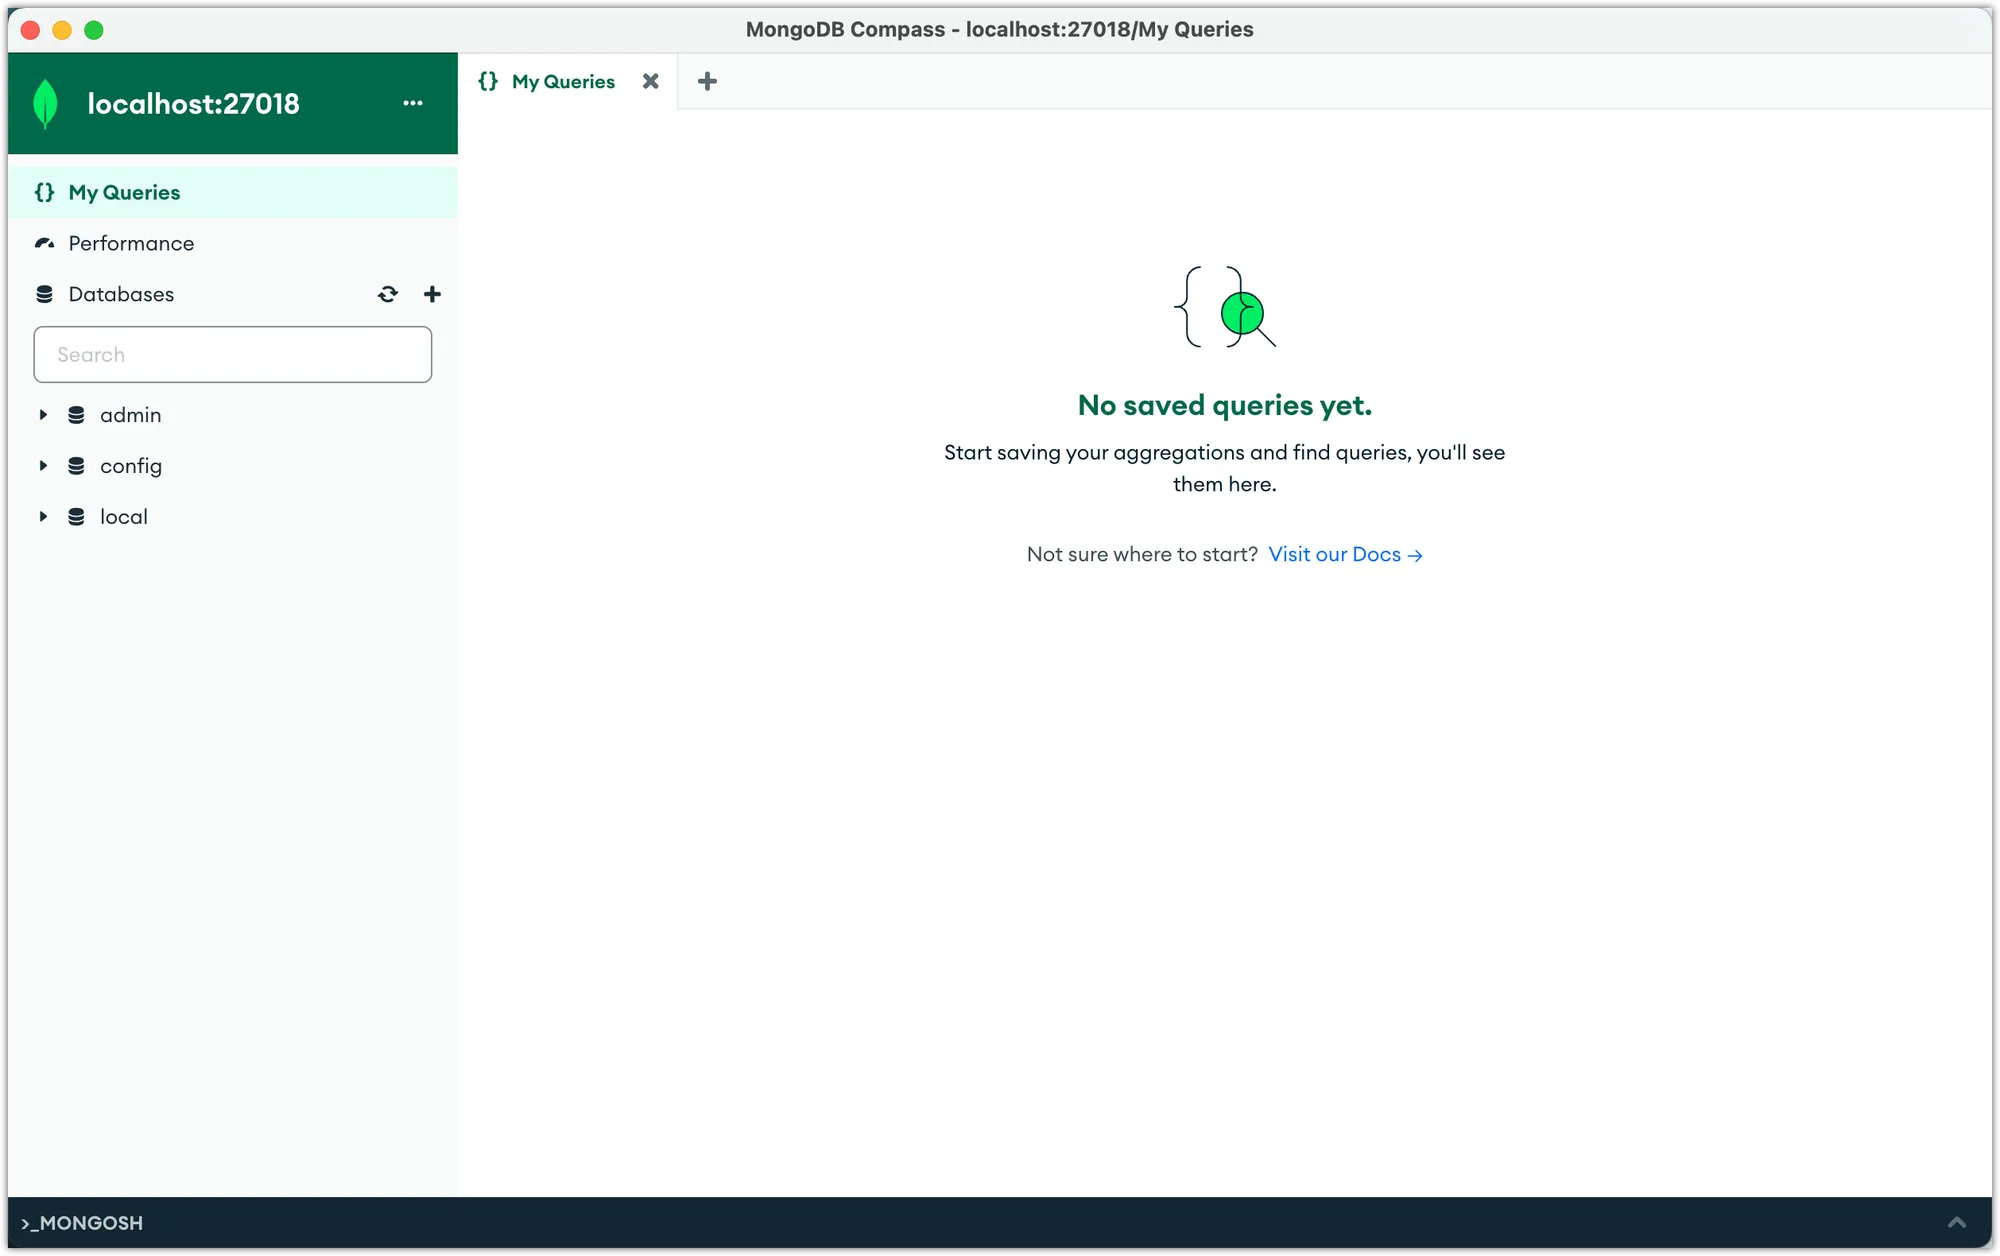
Connect to the MongoDB Container: You can now connect to the MongoDB instance running in the container using the same connection string we used earlier:
mongodb://localhost:27018You should be able to connect to this instance using MongoDB Compass.
Using the Redis Docker Image
Similar to MongoDB, we can run Redis as a Docker container using the official Redis image from Docker Hub.
-
Pull the Redis Image: Open a terminal or command prompt and run the following command to pull the latest Redis image:
docker pull redis -
Run the Redis Container: Once the image is downloaded, you can run a Redis container with the following command:
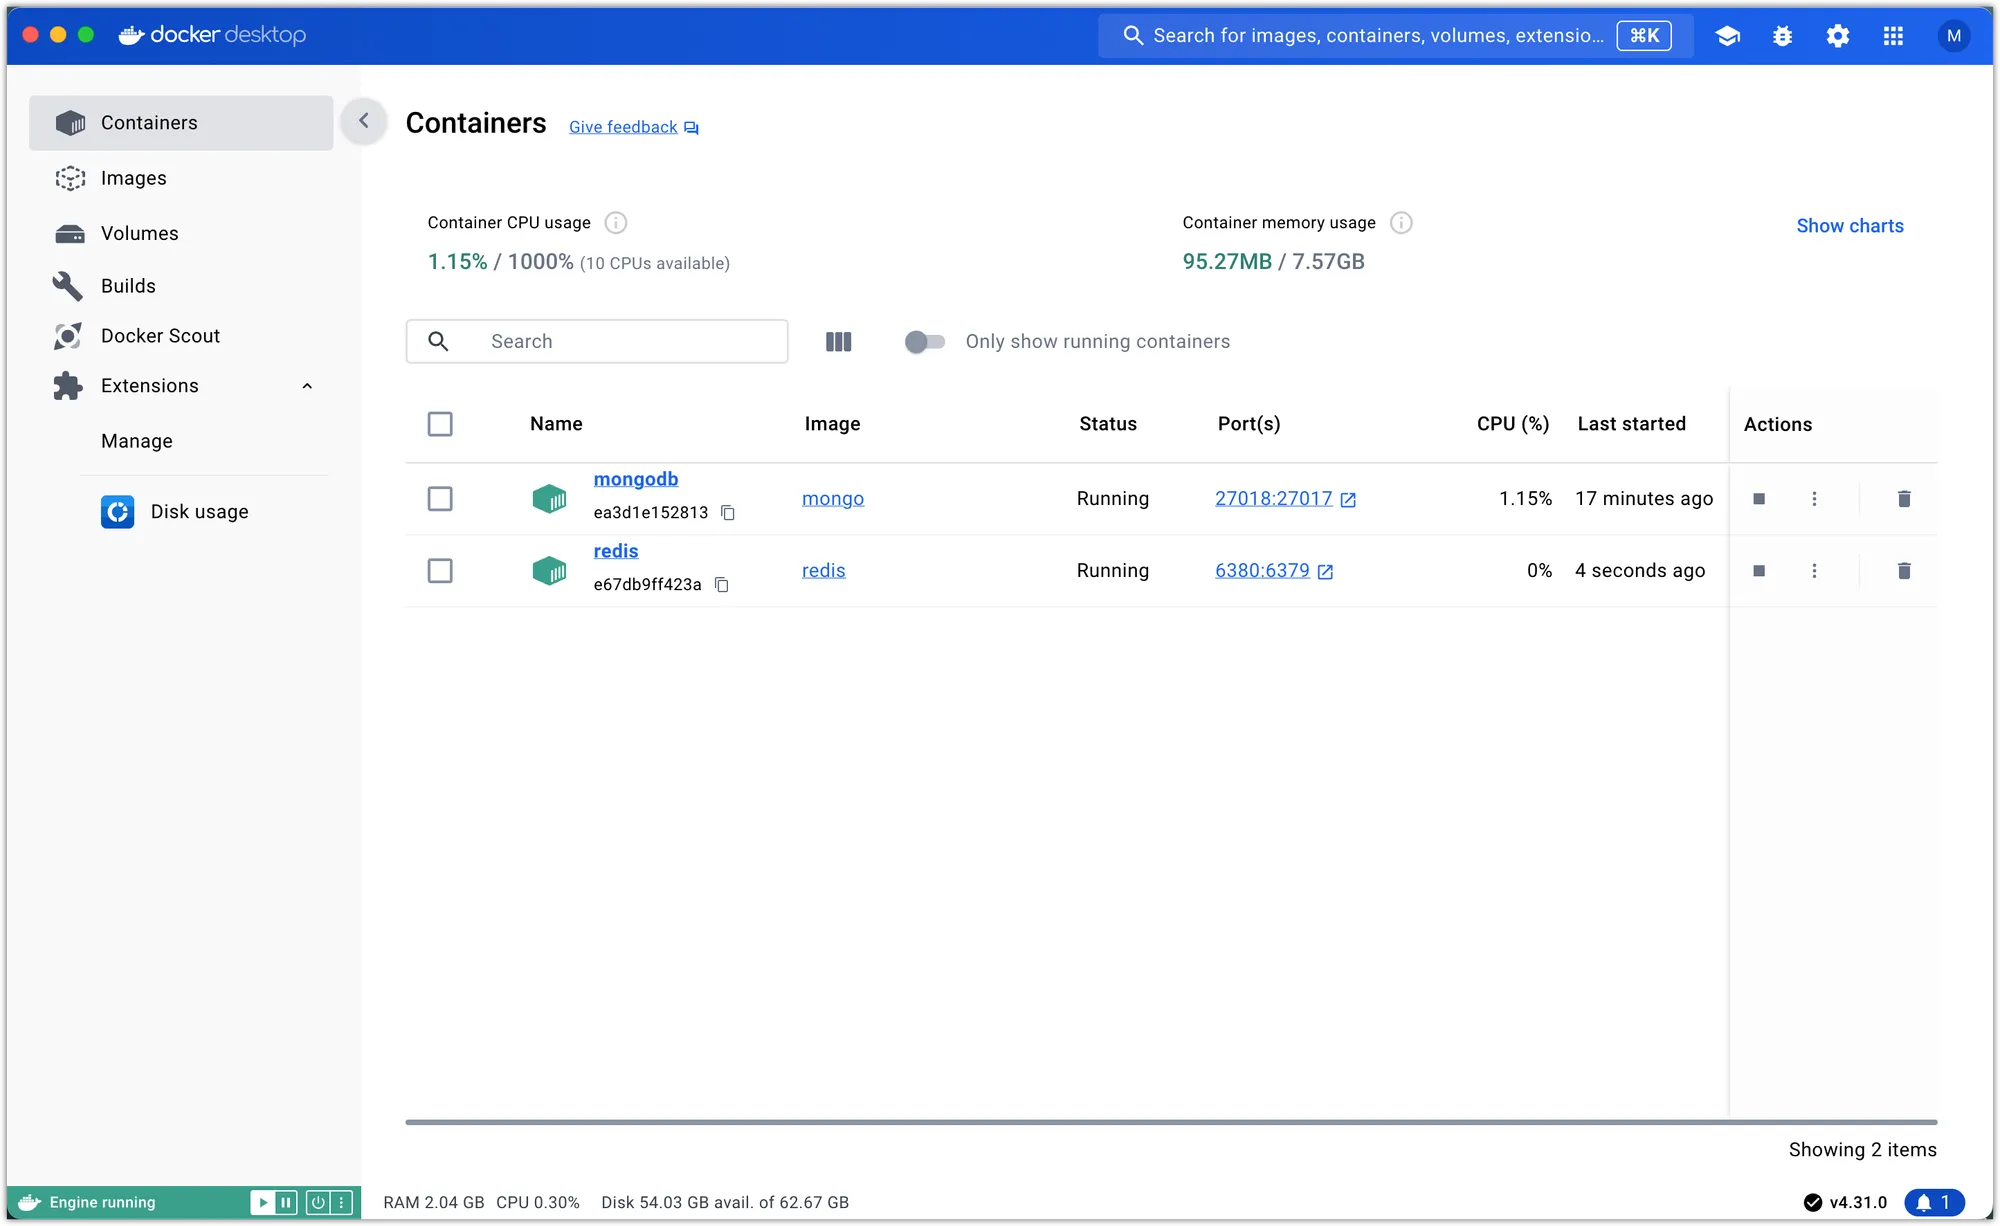
docker run -d --name redis -p 6380:6379 redisThis command operates a new Redis container in detached mode (
-d), names itredis, and maps the container’s port6379to port6380on the host machine. We’re using6380instead of6379because a locally installed Redis is likely running on that port.When you open Docker Desktop, you should see the Redis container in operation.
-
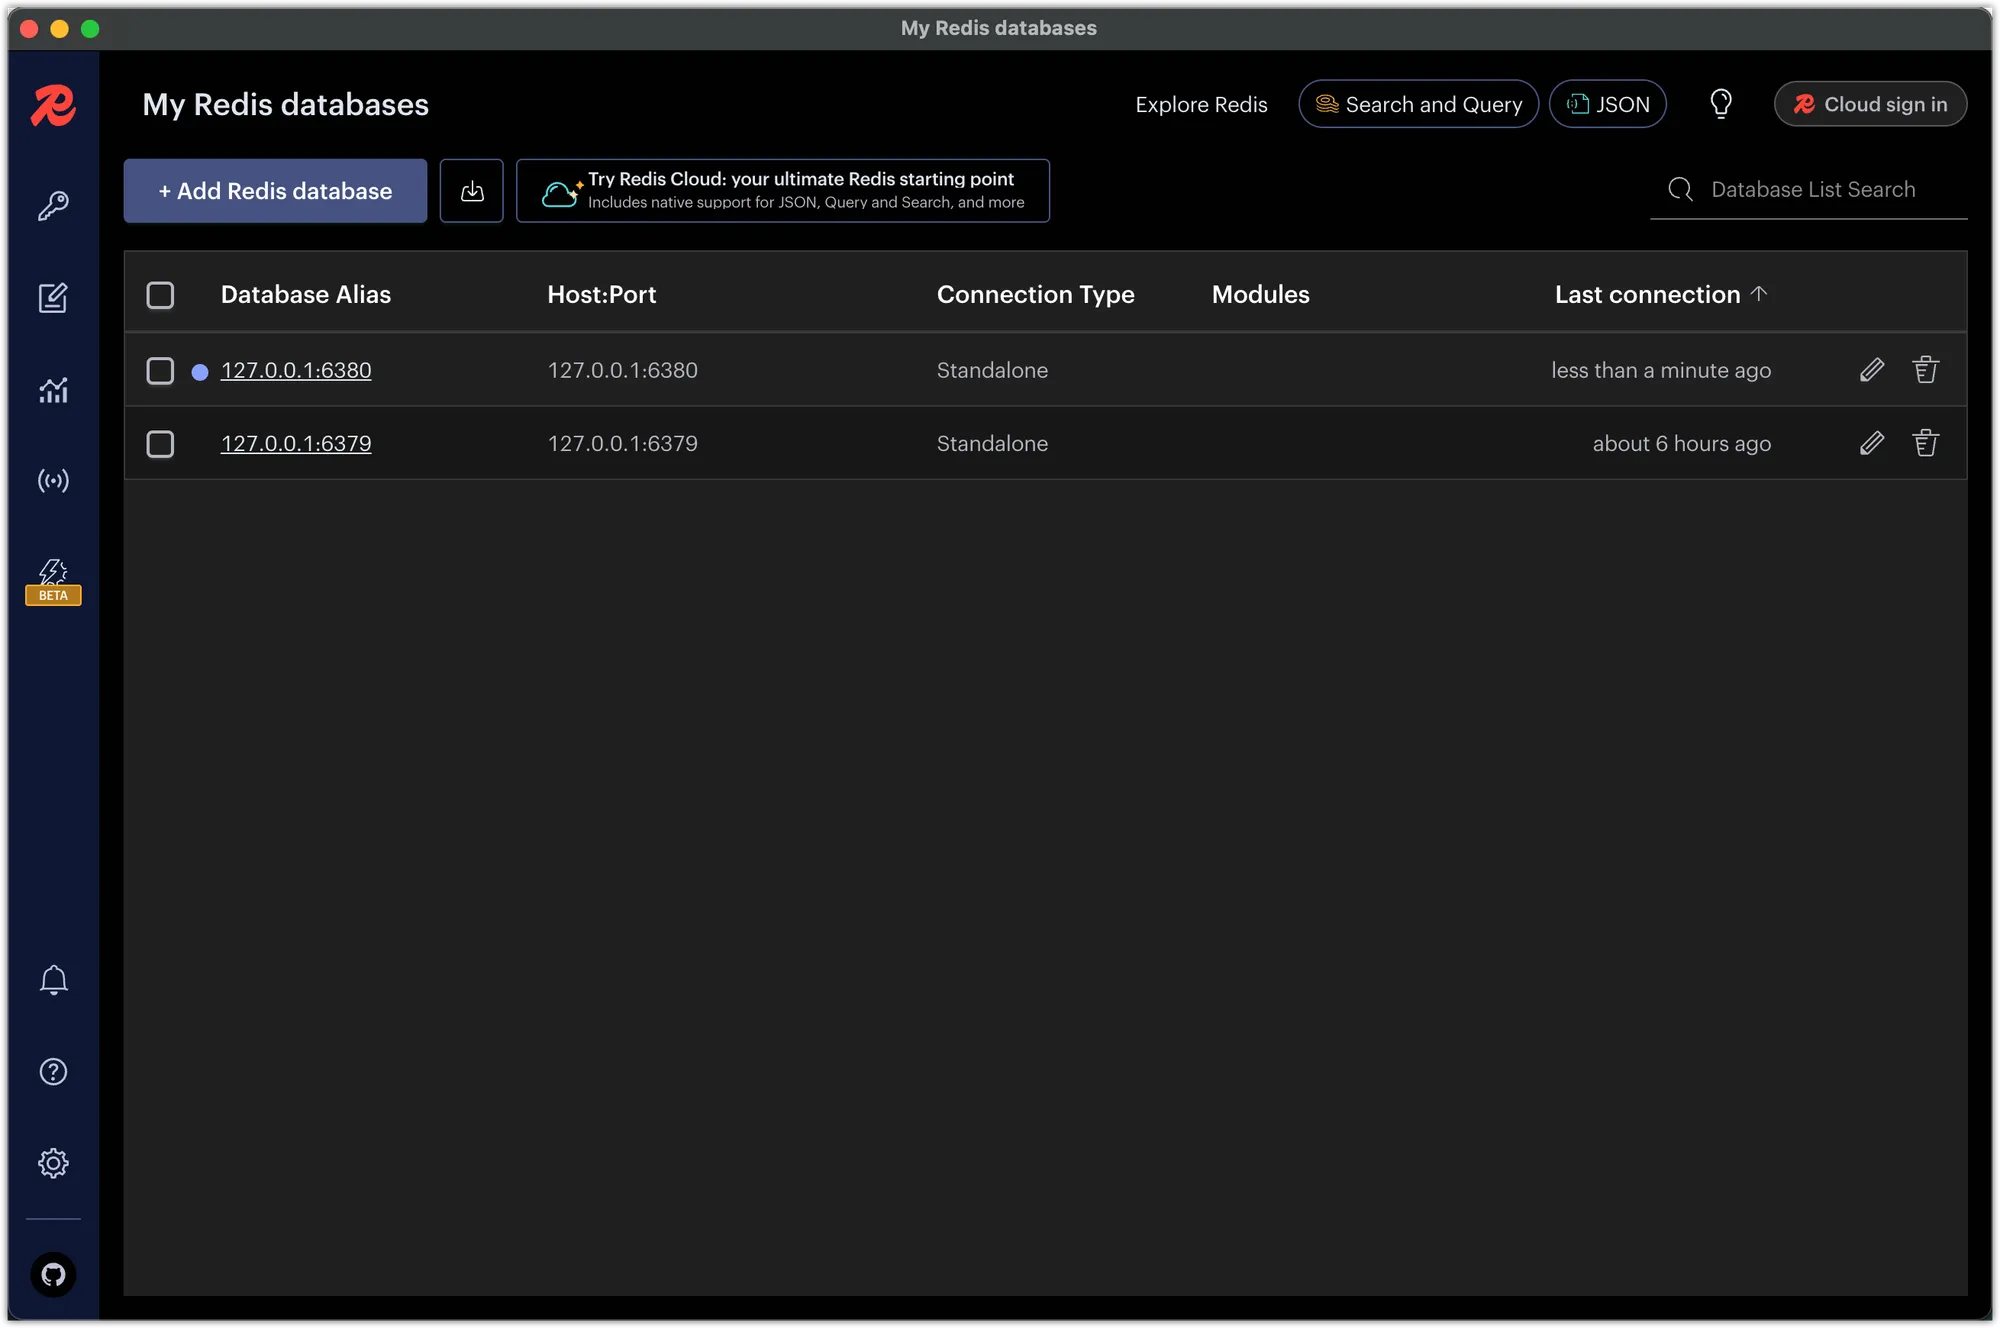
Connect to the Redis Container: You can now connect to the Redis instance running in the container using the same connection string we used earlier:
redis://localhost:6380You should be able to connect to this instance using Redis Insight.
Configuring Docker Compose
While running individual containers for MongoDB and Redis is straightforward, managing multiple containers can become cumbersome as your application grows. Moreover, you may want to use separate containers for different projects or environments. Docker Compose simplifies defining and running multi-container Docker applications.
-
Create a
docker-compose.ymlFile: In the root of your project, create a new file calleddocker-compose.ymlwith the following content:version: '3' services: mongodb: image: mongo # Use the official MongoDB image ports: - 27019:27017 # Map container port 27017 to host port 27019 volumes: - mongodb_data:/data/db # Use a named volume for data persistence redis: image: redis # Use the official Redis image ports: - 6381:6379 # Map container port 6379 to host port 6381 volumes: - redis_data:/data # Use a named volume for data persistence volumes: mongodb_data: # Define a named volume for MongoDB data redis_data: # Define a named volume for Redis dataThis file defines two services:
mongodbandredis. The MongoDB service uses the official MongoDB image, maps port27017on the container to port27019on the host, and uses a named volume (mongodb_data) to persist data. The Redis service uses the official Redis image, maps port6379on the container to port6381on the host, and uses a named volume (redis_data) for data persistence.We need the volumes to ensure that the data stored in MongoDB and Redis persists even if the containers are stopped or removed. The named volumes (
mongodb_dataandredis_data) are created automatically by Docker Compose when you run the containers. They store the data in a location that is separate from the container filesystem. When we define the services, we specify which volume is used for each service. For example, the MongoDB service uses themongodb_datavolume for storing data. It mounts the volume to the/data/dbdirectory inside the container, where MongoDB stores its data.The requirement to specify the version of the Docker Compose file format has become obsolete. As a result, you no longer need to include
version: '3'in your files (a requirement that was previously necessary). However, it is still recommended to specify the version to ensure compatibility with services that rely on specific version numbers (such as Docker Swarm), avoiding any potential issues. -
Start the Containers: Execute the following command in the root of your project:
docker-compose up -dThis starts the containers in detached mode (
-d), allowing you to continue using the terminal.By default, Docker Compose uses the name of the directory where the docker-compose.yml file is located as the project name. You can assign a custom project name by using:
docker-compose -p project_name up -dThe project name serves as a prefix for all resources created by the Compose file, including containers, networks, and volumes. The names of the services defined in the file (mongodb and redis in this case) are used as the basis for container names. Each container’s full name is constructed using the following format:
<project_name>_<service_name>_<index>.The
indexvalue starts at 1 and increments if you scale a service to multiple instances. For example, if your project folder is namedmern-backend, when you open Docker Desktop, you should see themern-backendproject in operation with two containers:mern-backend-redis-1andmern-backend-mongodb-1.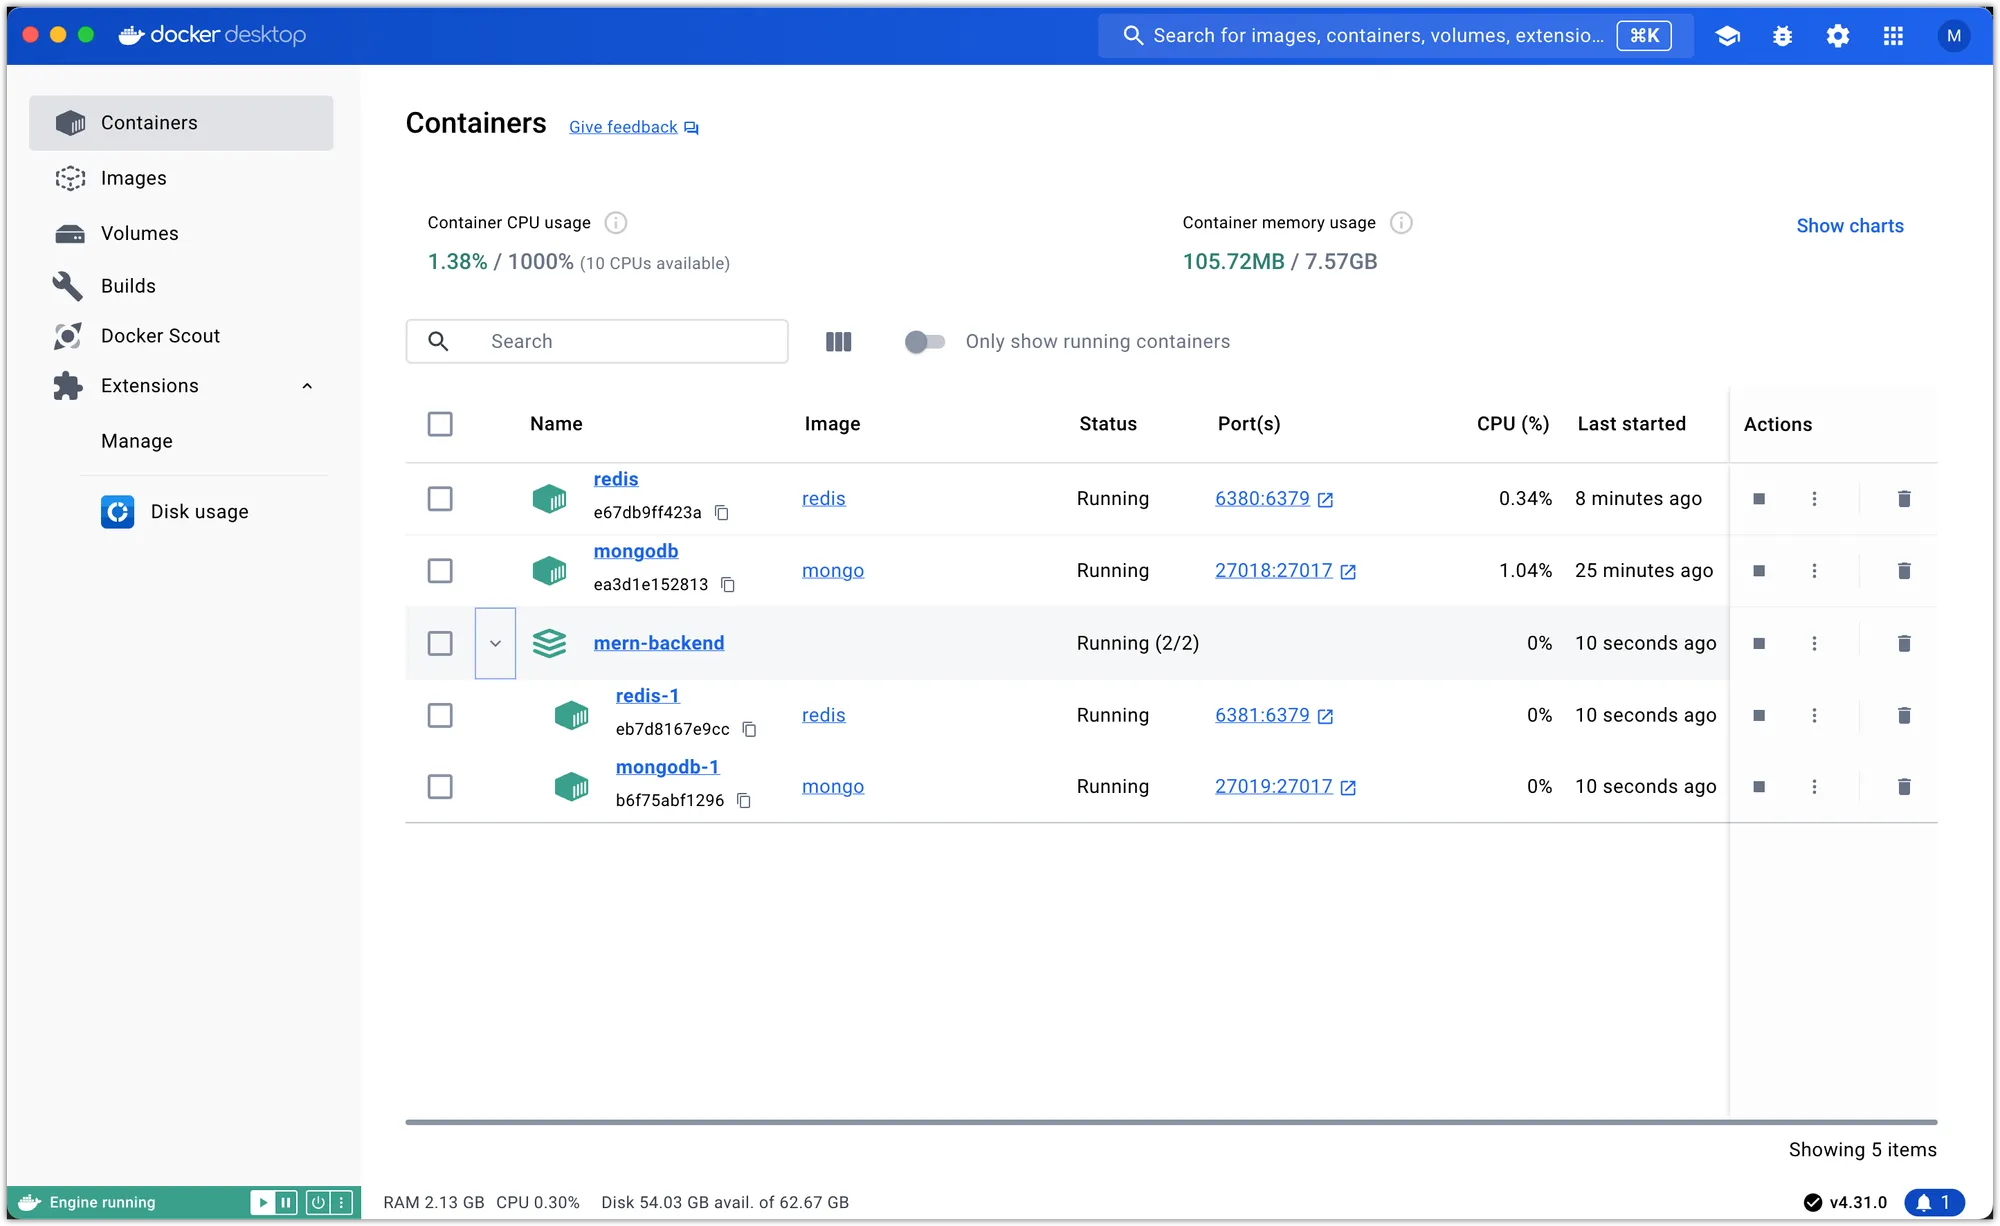
-
Stop the Containers: Run the following command to stop the containers:
docker-compose downThis command halts and deletes the containers, networks, and volumes specified in the
docker-compose.ymlfile. Be sure to carry out this step before moving on. Upon opening Docker Desktop, there should be no trace of themern-backendproject and its associated containers.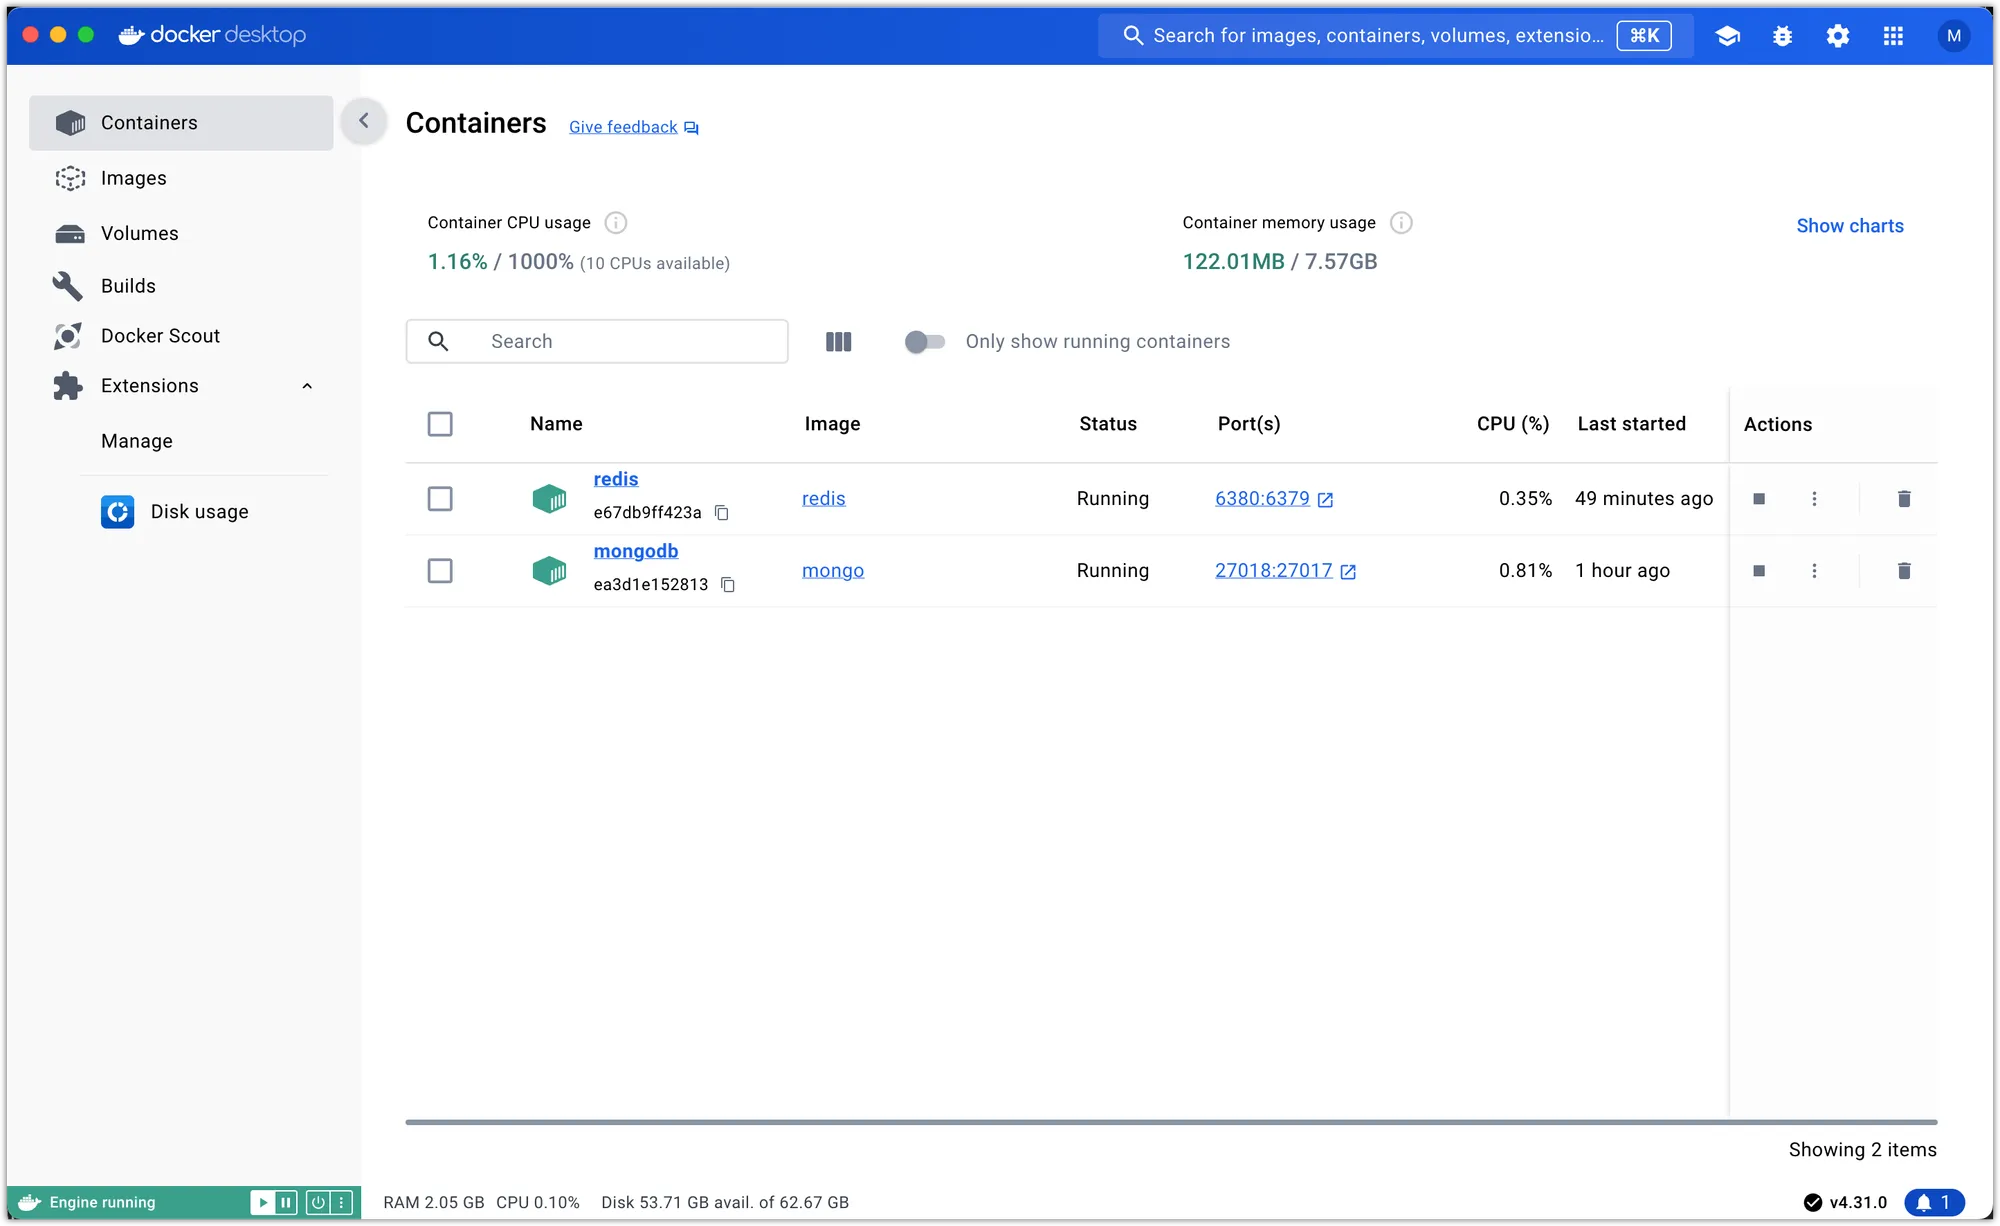
Alternatively, you can use the Docker Desktop app to stop and delete the containers. Pay attention to the action buttons under the “Actions” column, located at the far right of each container listed in the “Containers” table.
By using Docker Compose, you can easily manage and orchestrate multiple containers for your MERN backend stack. In the next step, we’ll integrate the Docker containers into our Node.js application and configure the necessary environment variables.